
help - Economic operators
User manual
Below you will find a complete guide to use the application.
We will continuously update this page with the last updates of the application.
HELP – ECONOMIC OPERATOR
User manual
This manual details the steps to be followed for using the “Ridis” platform. This is the platform for generating identifiers for economic operators, places for business, machinery, unitary identifiers and aggregated identifiers
CONTENT
Accessing the platform by Economic Operators registered as Retailers
Accessing the platform by Economic Operators registered as Producer Importers and Distributors
General features - for Economic Operators registered as Producer Importers and Distributors
Case management
Management of Economic operators
Management of Machines
Management of Generating Unit Level Identifiers
Management of Generating of Aggregated Level Identifiers
Accessing the platform by Economic Operators registered as Retailers
The platform can be accessed using the following address: www.ridis.ro.
Next, we will show how to recover the forgotten password (if the economic operator is already registered), how to recover the email address (if there is no longer any certainty of the email used) and how to register a user who activates as a company or any other form of economic operator registered with the Trade Register and whose object of activity is the retail sale of tobacco products.
Password recover
In case the user does not remember his password he will have to follow the steps highlighted in the images below.
Login window -> Forgot password? -> Password reset window -> Type the email address


Email recover
In case the user does not remember the email address used when registering on the platform will have to follow the steps highlighted in the images below.


If the user is not registered, the registration option will be selected, which is customized for economic operators of the retail type, respectively for manufacturers, distributors and importers.
Utilizatorul va completa toate câmpurile din cadrul formularului de înregistrare:
- Name – The data entered must be only from letters;
- First Name – The data entered must be only from letters;
- Email – The email address must be valid, because it will be request to be confirmed;
- Password – must contain a minimum letter in uppercase, one in lowercase, a number, and a minimum of 8 characters;
- Password Confirmation – The password must be the same with the one entered in the Password field.
The registration will be completed by pressing the Register button.
The user will be sent by email the confirmation of the created account and its activation address (link). At the same time, the user will have the possibility to retransmit the verification code if the email has not been successfully received.←CONTENT
Login window -> Register -> Register window


Email -> Password -> Confirm password -> Press “Register” -> Verify the account from the email sent -> Return to Login window and type email and password -> Press “Login”


Accessing the application – Dashboard
After Register, the application will open the screen below (dashboard). At the top, on the left, on the white stripe containing the RIDIS logo, you can see the hamburger menu (3 horizontal lines). Also on this strip you can see on the right, the bell icon for the notifications intended for this user that will come from the system and the icon consisting of four rectangles that will open this very dashboard.
Immediately below, we notice a white stripe in which the steps (stages) that must be taken in order to register the economic operator are highlighted. Each stage that is not covered has an orange circle with the exclamation mark to warn about this.
Below we see the registration module of the economic operator and to its right the way of recording the working point of the economic operator. To begin with, the economic operator must be registered. After registering it, the button to register the work point will also become active.

Organization configuration
If we press the menu button to the user (hamburger icon), from the right side a menu will appear in which we have the following options: to log out of the application, access the Terms and Conditions section, change the language, fill in the details of the oragnization or return back to the list of cases.

The mandatory fields are marked with “*” and are required to complete the registration.
Mandatory fields:
- Name ;
- Acronim/VAT;
- Email;
After filling the mandatory fields we will press the Save button. ← CONTENT

Economic operator registration


Validation of the data entered and sending to the system.
After entering the data, they can be checked by clicking in the middle of the document “Confirmation of economic operator registration”. To modify certain data, we will have to press the Edit round green button at the top right of the document.

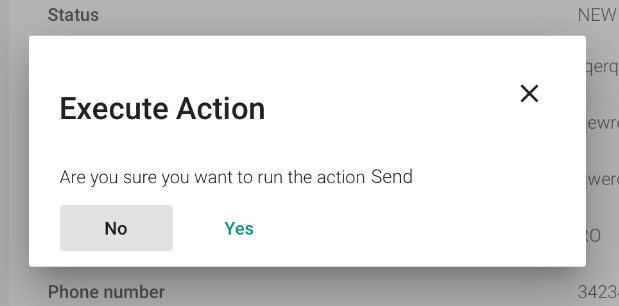
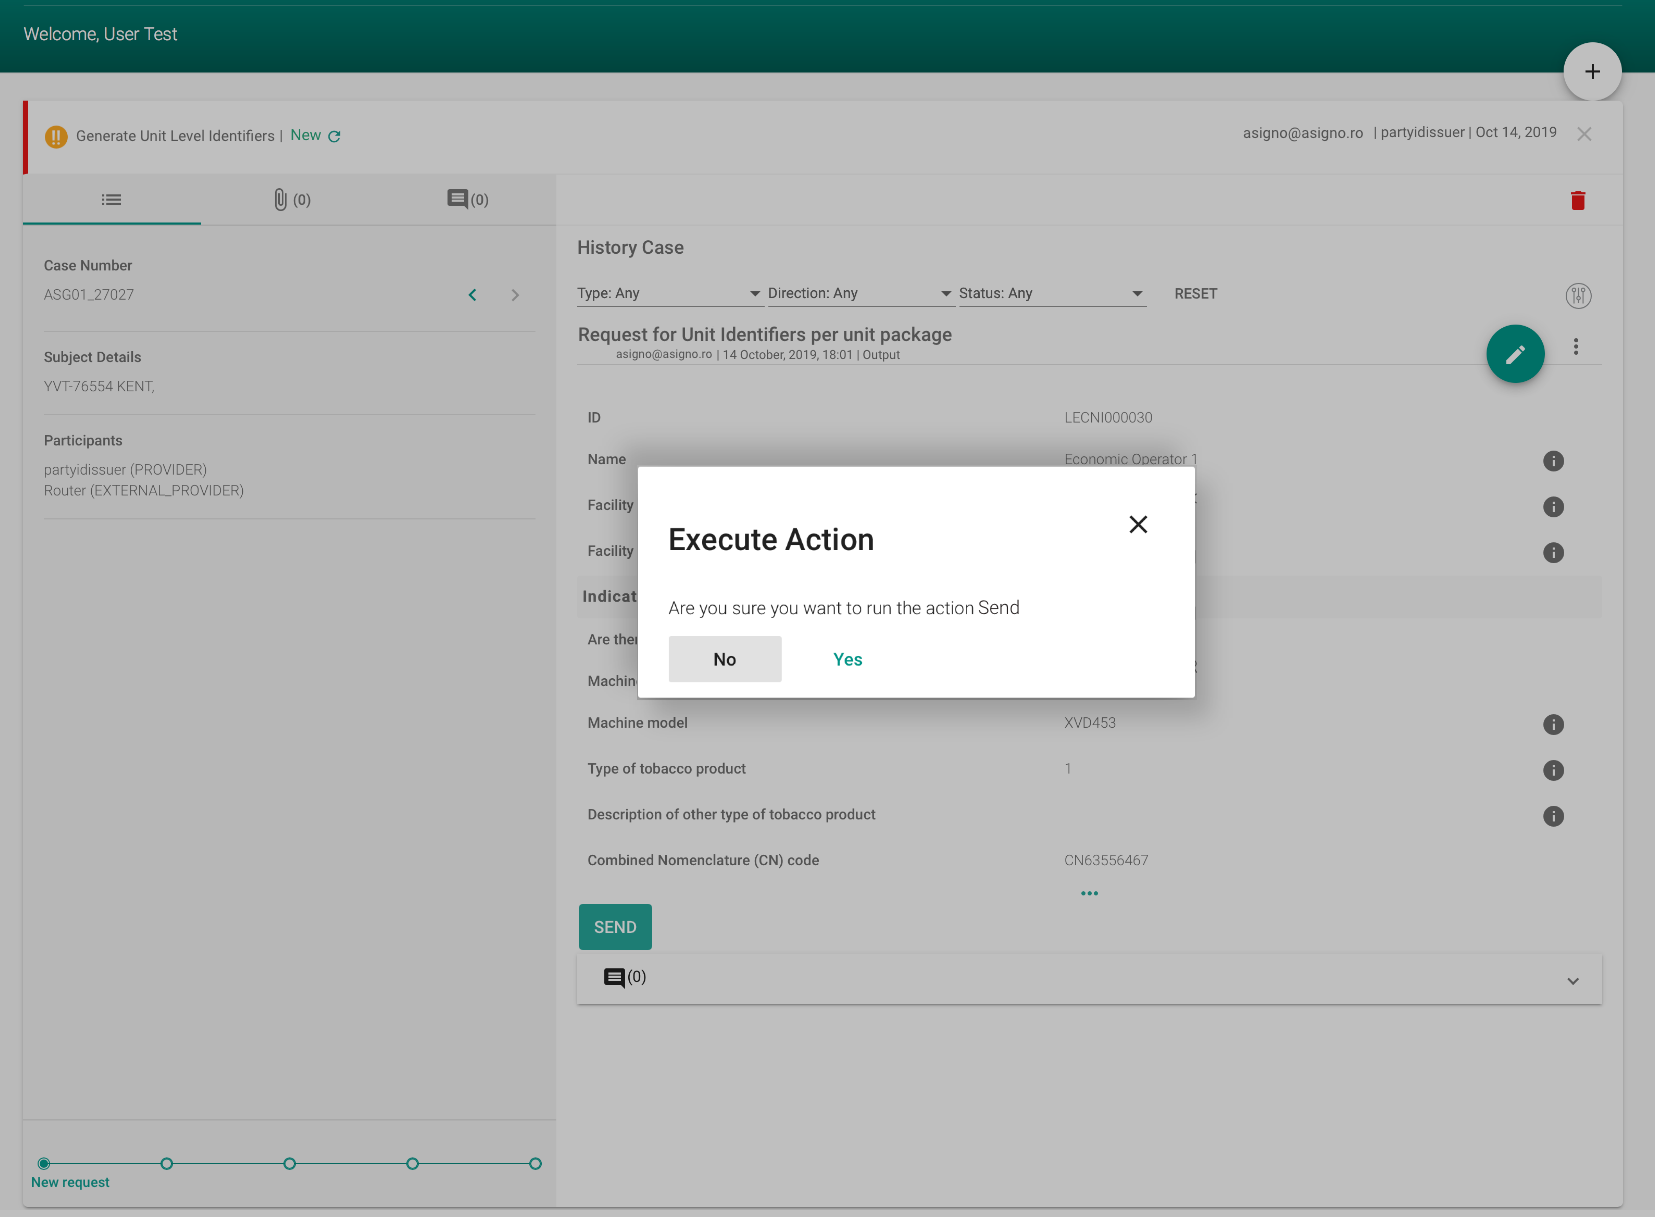
To send the data we will press the “Send” button and press the “Yes” button (if this is our option) in the confirmation window “Execute action”.


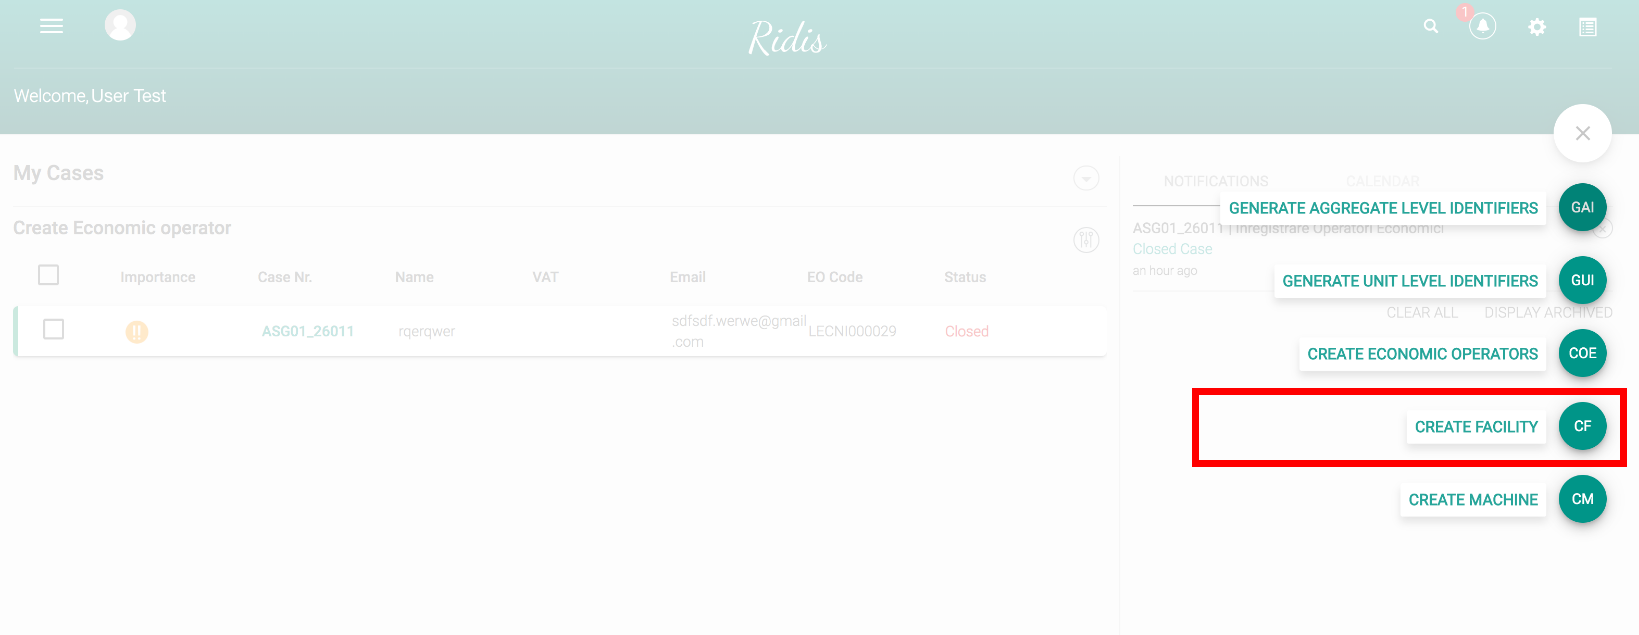
Facility registration
With the registration of the economic operator we notice that the button “Add working point” is active and we will press on it to start this process. It will open a page where the conditions that you must accept are listed in order to continue the registration process.

After the “Accept” of the conditions, a form will be opened in which we must fill in the minimum mandatory fields. Below is given an example. After the mandatory fields have been filled in, the “Save” button will also be activated.

Validation of the data entered and sending to the system.

To send the data we will press the “Send” button and press the “Yes” button (if this is our option) in the confirmation window “Execute action”.


At the top you can see a “Deactivate of work point” button. It can be used in case we want to deactivate the working point. After pressing the button, you will notice a field where you need to enter the reason for disabling.

Once we have finished registering the work point we can return to the main screen either by pressing the RIDIS logo, by clicking on the icon at the top right with four rectangles (dashboard), or by pressing the close case “x” button at the top right, or by pressing the close case “x” button at the top right.
At the same time, we notice in the image below, that all the stages of registration are now complete and “green”. We also note that tapping on the notification icon shows in a pop-up window the last notifications.
At the end we notice that the buttons “Add Economic Operator” and “Add Facility” still remain active and we can add on a registered user, more economic operators and more work points.

The main menu of the app is accessed using the icon on the left side up (“Hamburger menu”).
Within it, the user can access the following resourcesMy cases;
-
- User profile;
- Current domain;
- The current organization;
- Terms and conditions;
- Disconnect.←CONTENT

The user profile can be changed and updated at any time. You can find the configuration details in the “User profile Configuration” chapter.
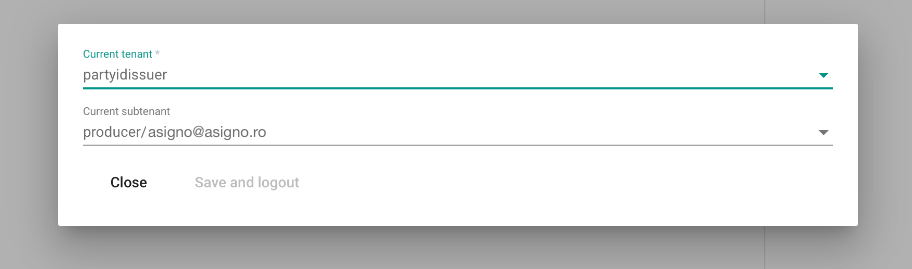
From the main menu, select the “Current domain” option that will open theCurrent user’s connectionDetails windowto the application services. The following items can be configured:
-
- The current group;
This group is assigned to the database (the current tenant) to which the user connects.
-
- The current sub-group.
This sub-Group is specific to the user’s company current selected.
Note: The current domain option is used when a user has rights to use for multiple domains (tenants) or companies.
If the user belongs to multiple groups/Sub-groups, it can change them, so he can benefit from the access at the installed environments or to companies from which the user is a part. ←CONTENT
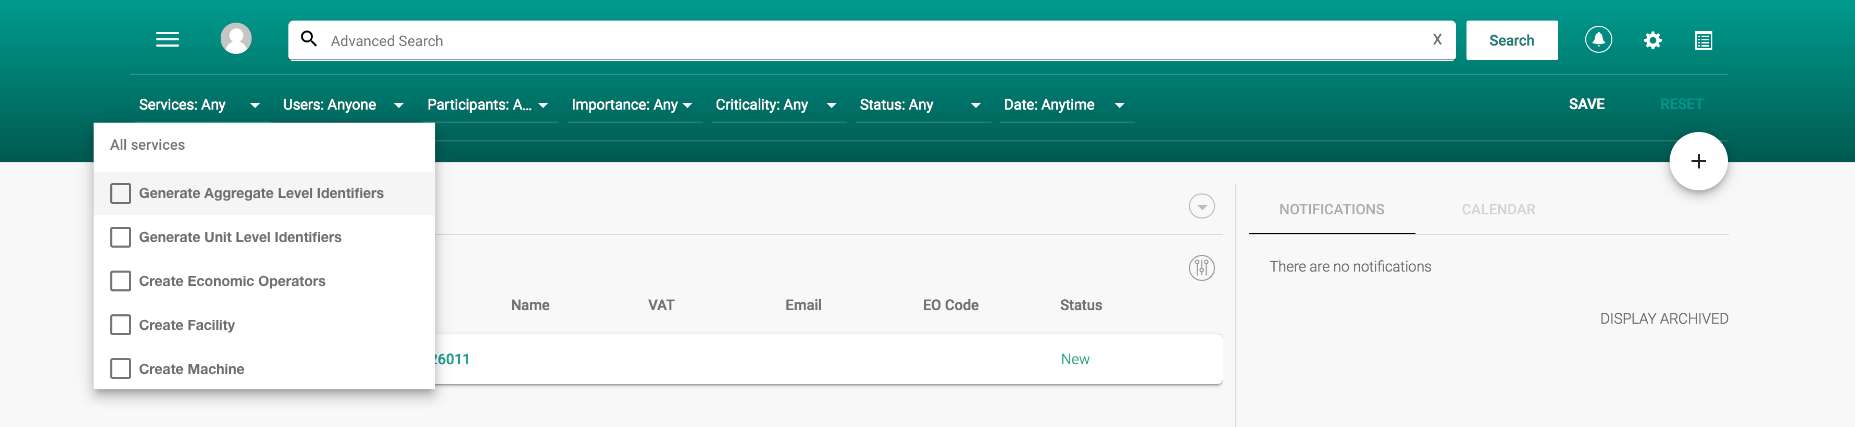
Within the platform there are a number of filters and methods for quickly retrieving cases from the system. To achieve that, you can select the Advanced Search button/icon, in the main page.

Advanced search criteria are:
-
- Services
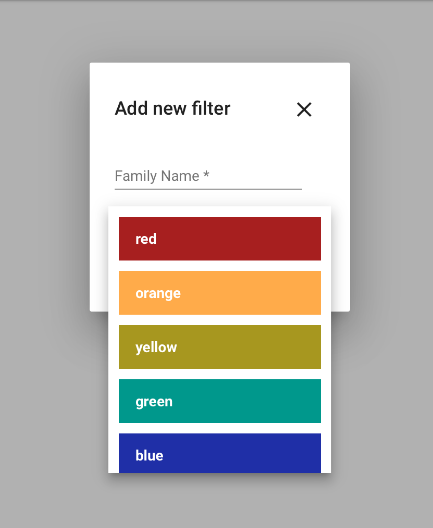
Service options are those specific to the implementation of Ridis, as shown in the image below:
-
- Generate Aggregated level identifiers;
- Generate Unit level identifiers;
- Create Economic operators;
- Create Facility;
- Create Machine.←CUPRINS
- Services
-
- User ratings
It will display all users within the currently selected subgroup (the company from which the connected user belongs).
- The importance
The importance of cases configured by the user:
- Unimportant
- Important
- Very important;
- User ratings

-
- Criticality;
Criticalityof the cases configured by the user:
-
- Critical
- Uncritical
- Criticality;

-
- Status of cases;
Available options:
-
- New
- Closed
- Open
- Status of cases;

-
- Date of last modified product on the case;
Available options:
-
- Anytime
- Last hour;
- The last 24 hours;
- Last week;
- Last month;
- Last year;
- Custom range.
- Date of last modified product on the case;
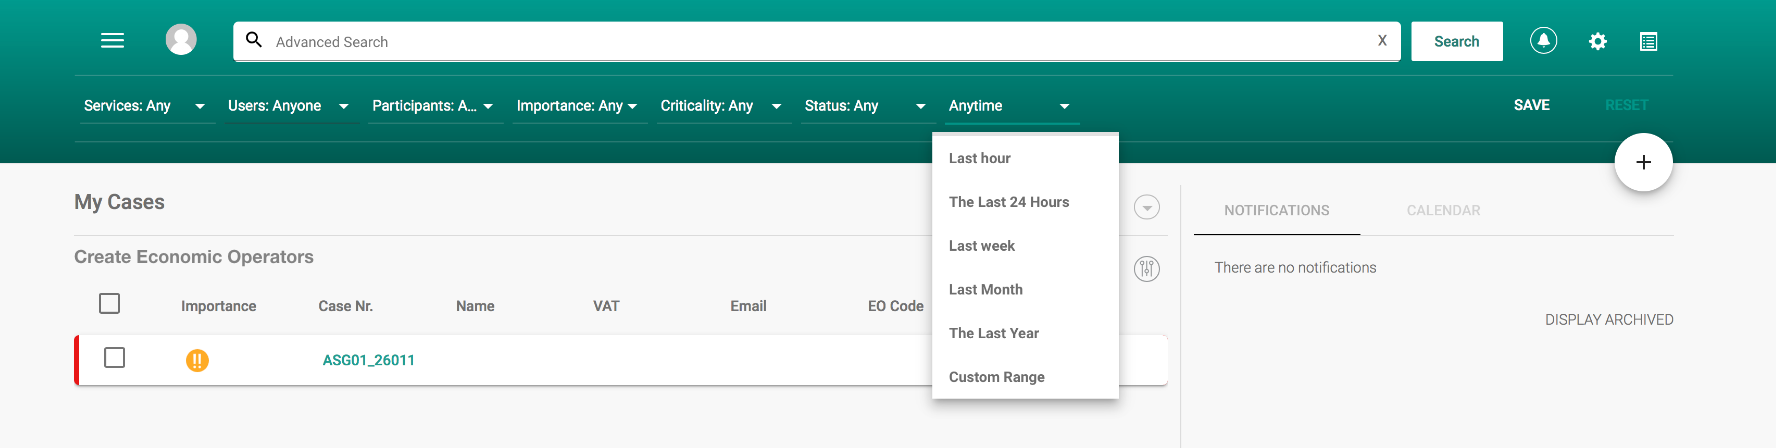
When selecting a custom range, the user will have the following options available:
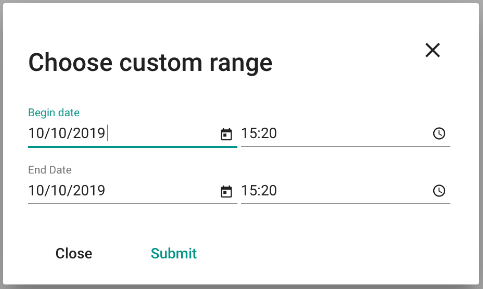
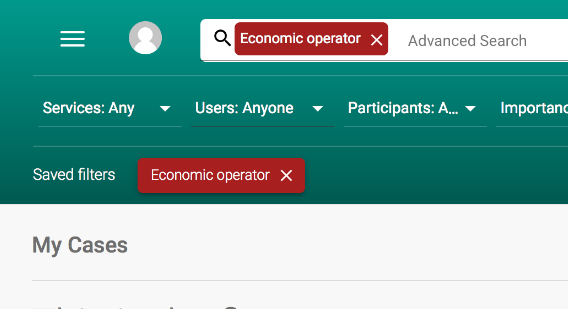
After selecting the search options, you can save this filter. The filter is useful for further searches.
The newly saved filter can be seen on the menu.
You can also select to activate the predefined search..
The app will show real-time notifications based on the specifics of the cases..
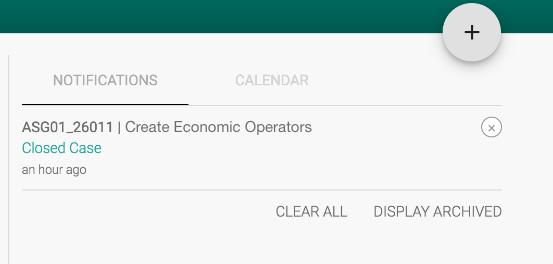
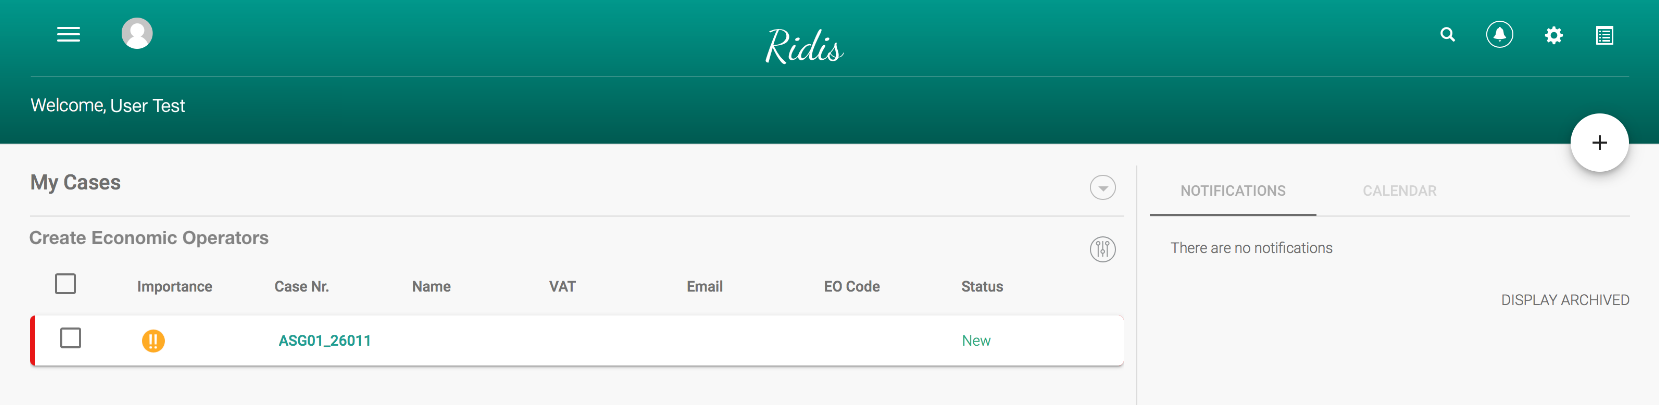
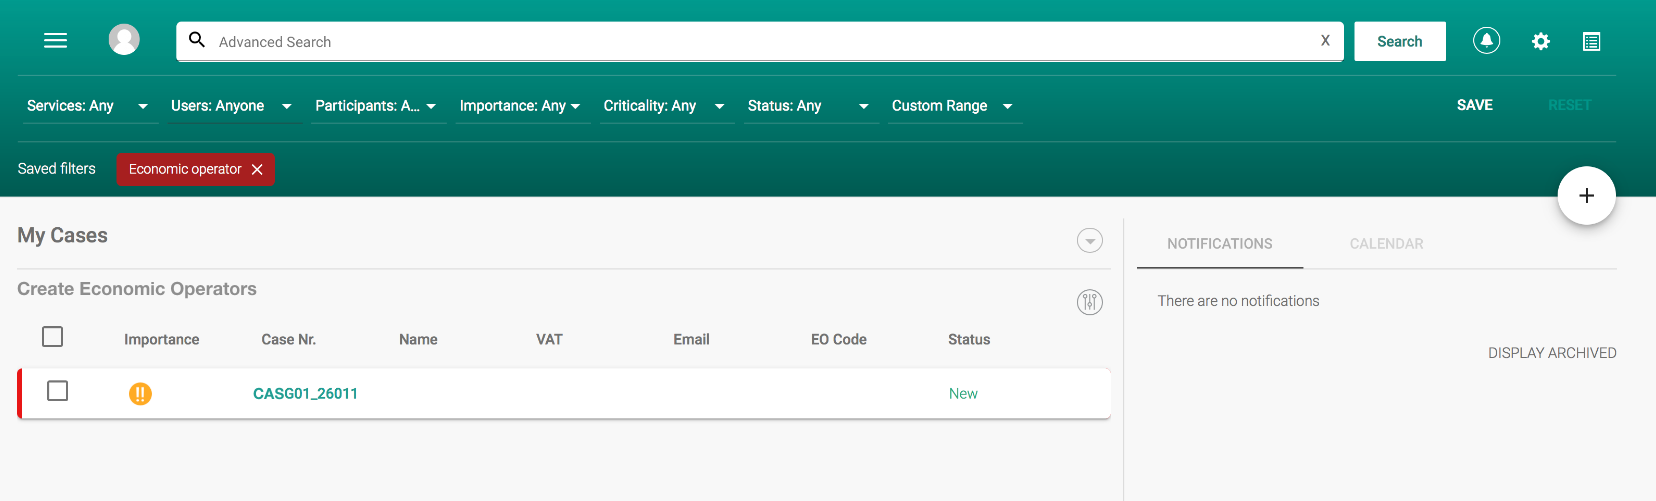
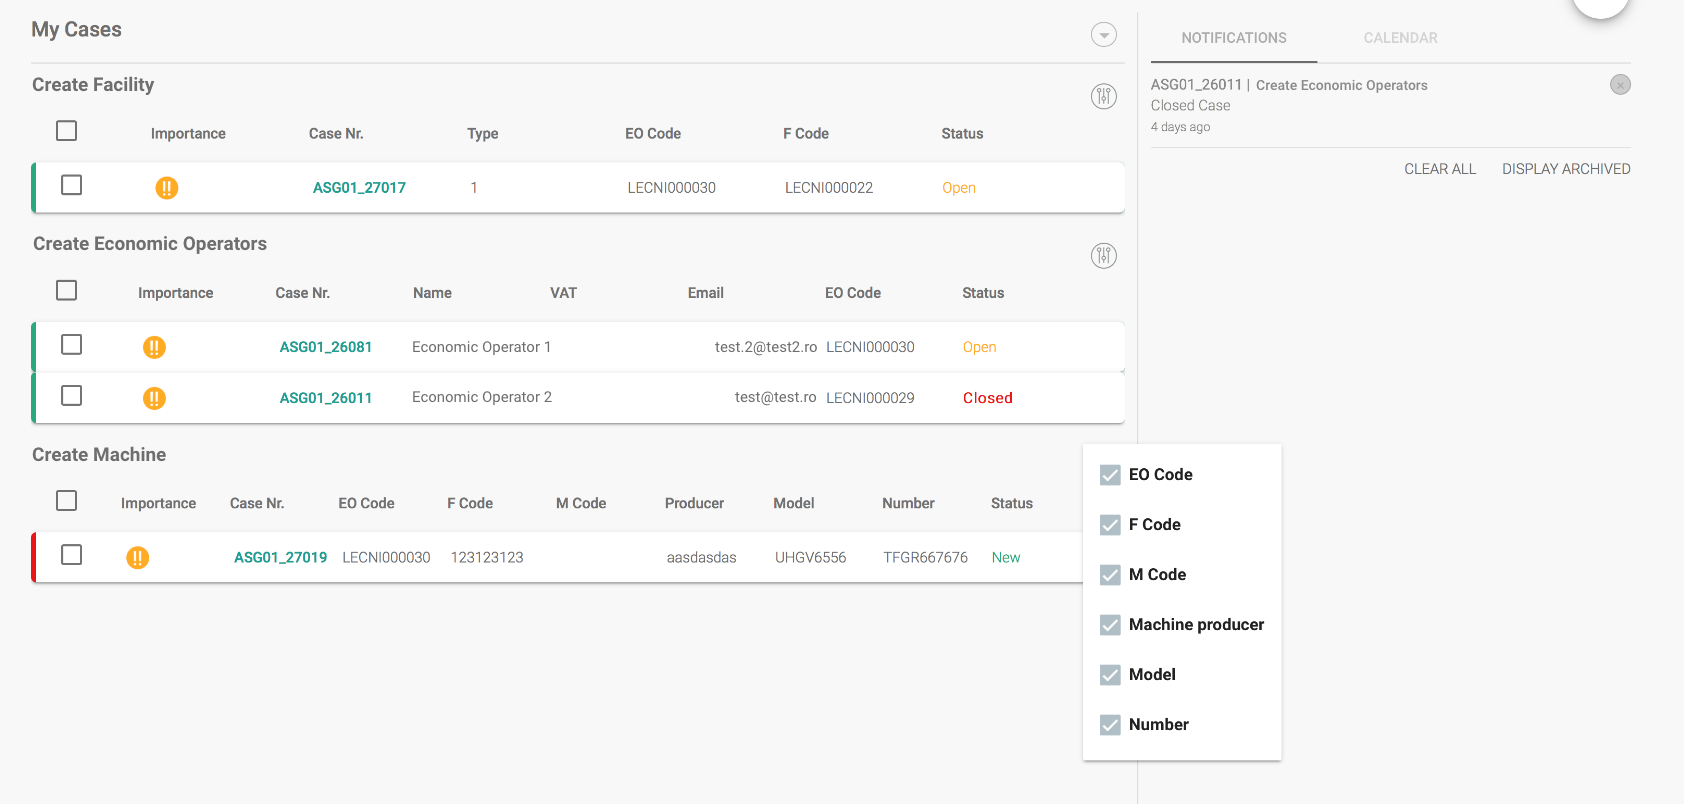
After connecting to Ridis, the user will be redirected to the main page. In the “My Cases” section, you can see all the previously recorded cases as well as their status.
On the right side of the screen, the notification pane generated by the cases is retrieved. ←CONTENT

-
- Generate Aggregated level identifiers;
- Generate Unit level identifiers;
- Create Economic operators;
- Create Facility;
- Create Machine.
-
- Retailer
- Manufacturer
- Importer
- Distributor
Depending on the user’s role, it can add different types of cases. The main rules for creating cases are listed below.
-
- All roles can add Economic operators and Facilities;
- Machine-type cases can only be added by manufacturers;
- Generating of Aggregated level identifiersand Unit level identifierscan be made by Manufacturers, Importers and Distributors.←CUPRINS
Economic operators shall request the CNIN through the Ridisplatformto issue an economic operator identification code. The request must contain the data referred inregulation EC 574/2018. ←CONTENT
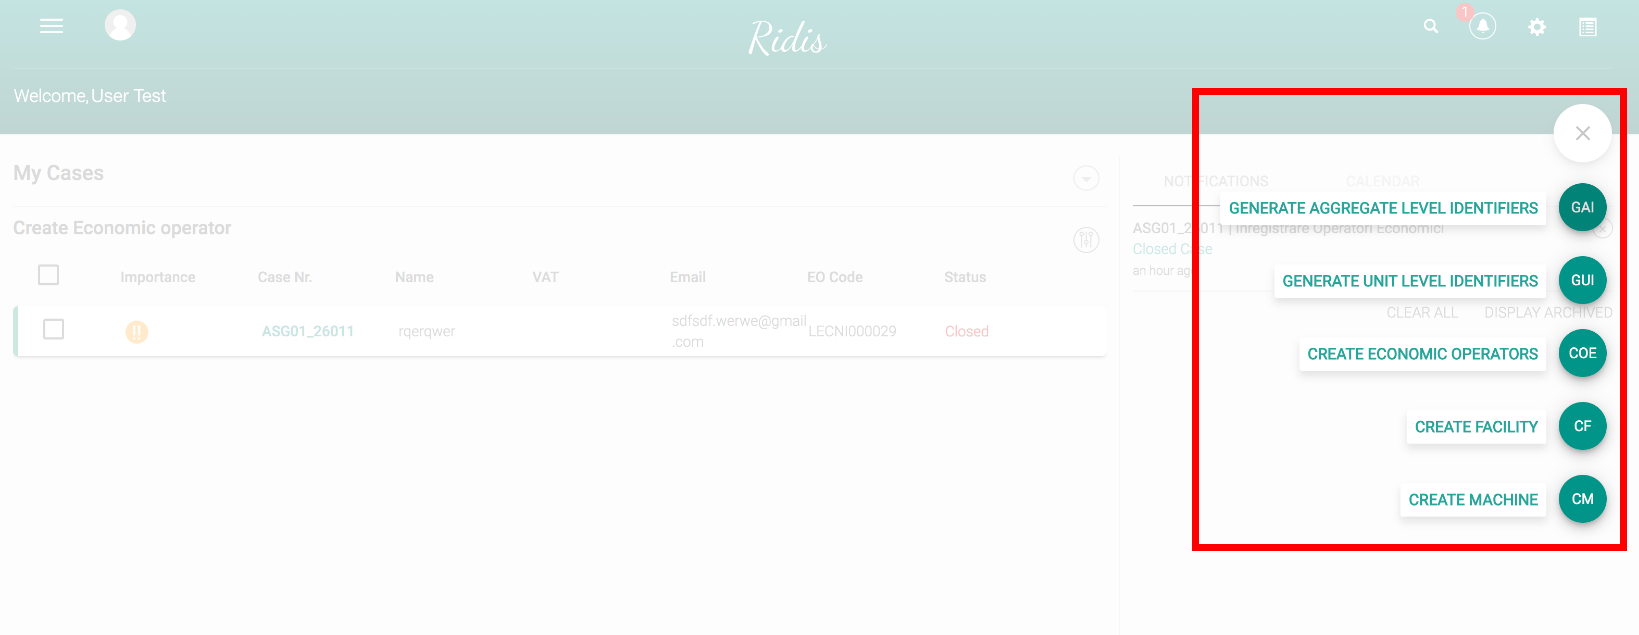
For the registration of a new economic operator, the option “Create Economic Operators” (CEO) is chosen..
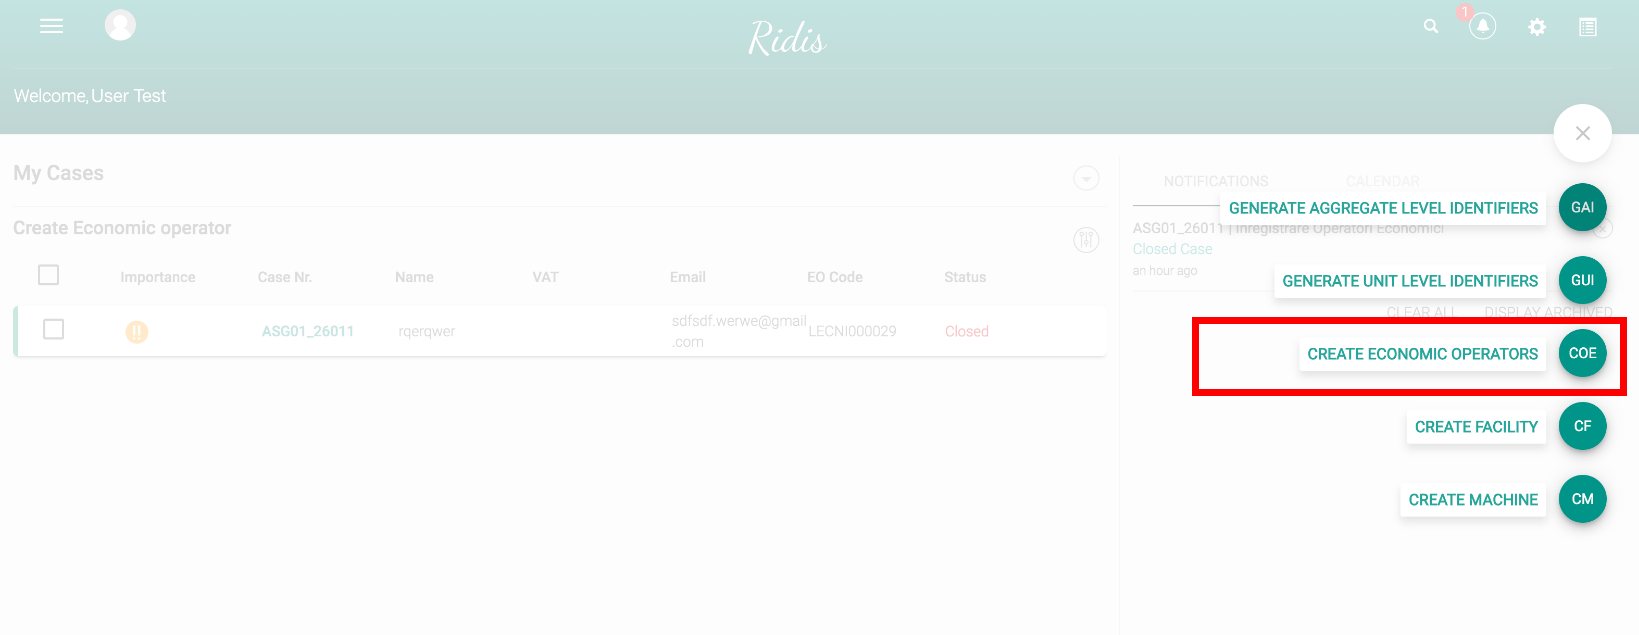
Before being redirected to the registration form of the new economic operator, it is necessary to accept the terms and conditions of registration.
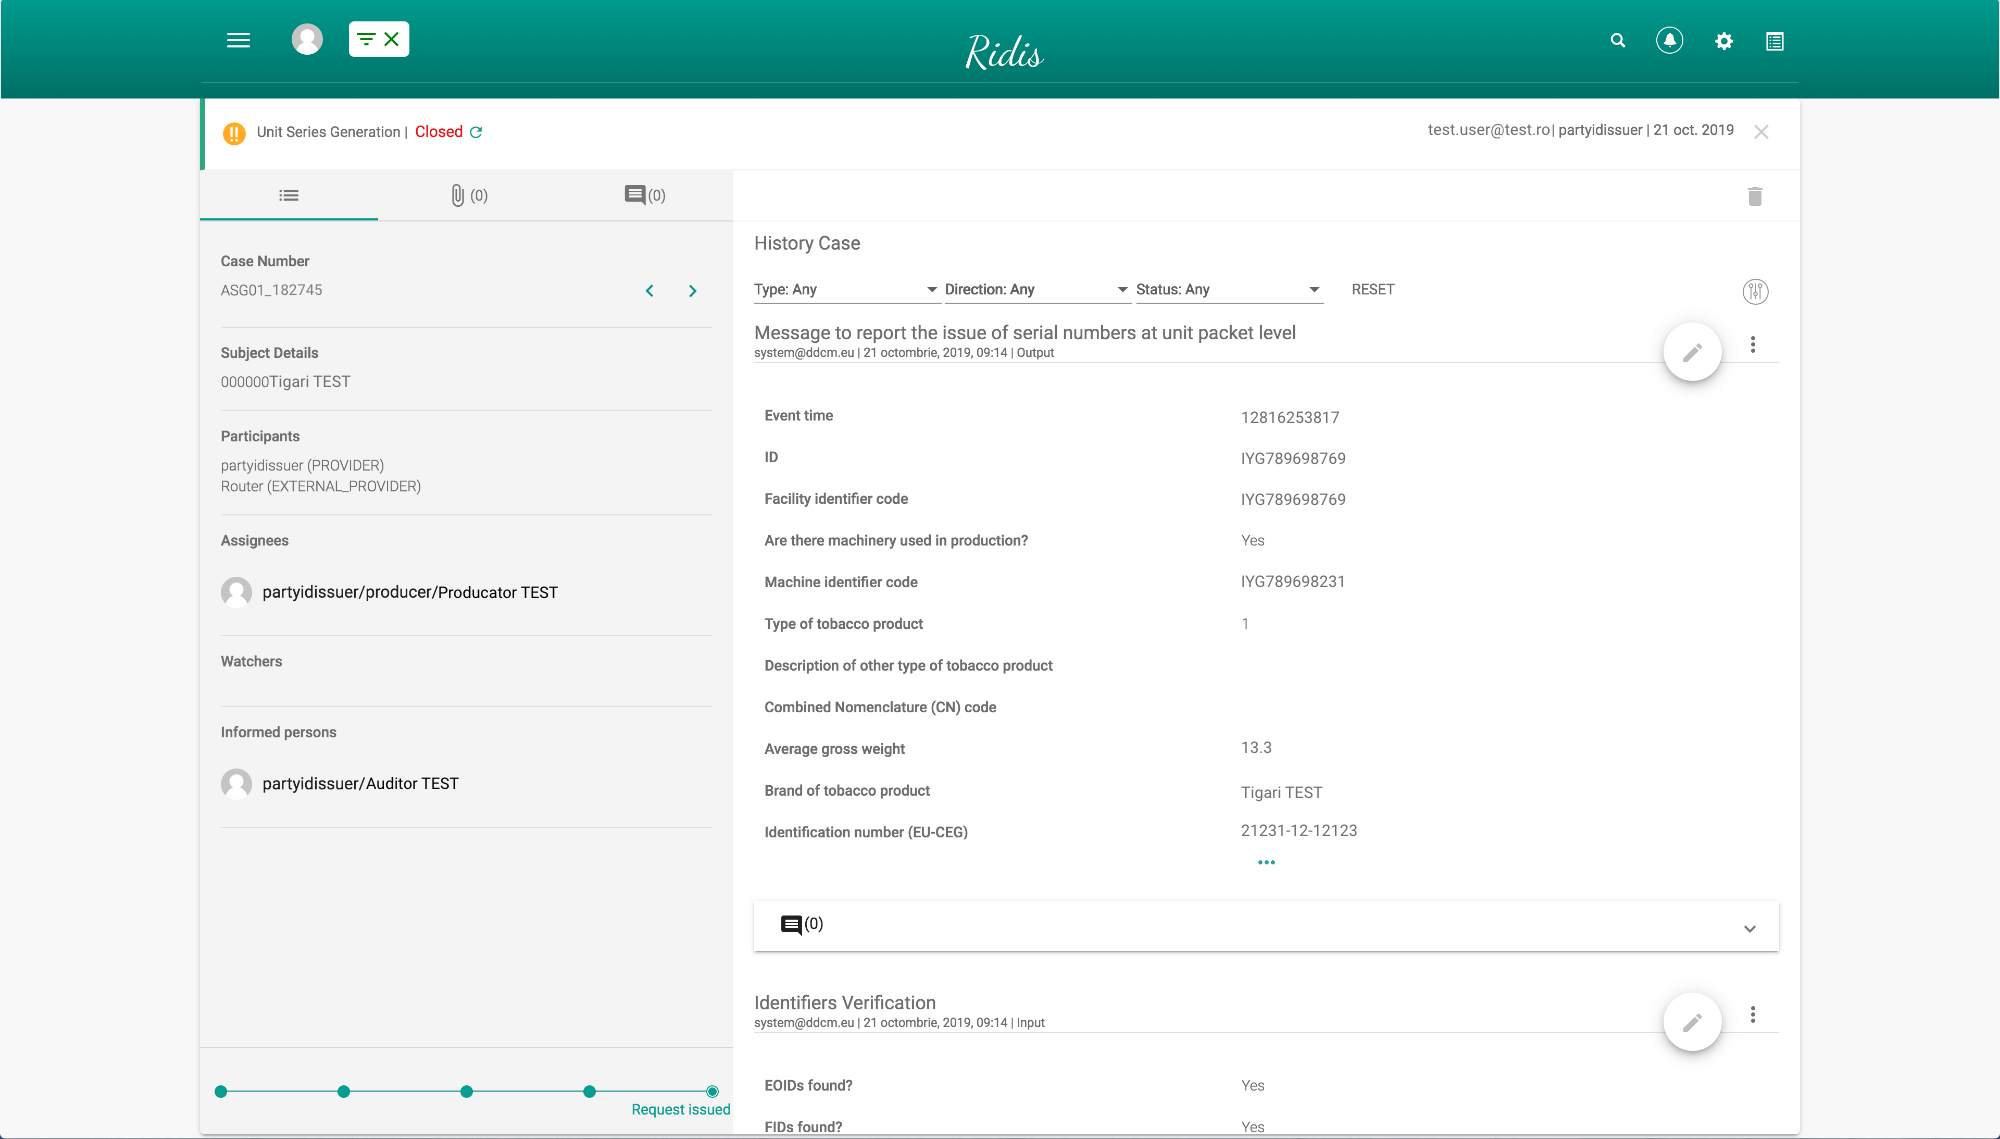
After accepting them, at the top, you can see the case type, the status of the case (new, open, closed), the person who created the case and the date of its creation.
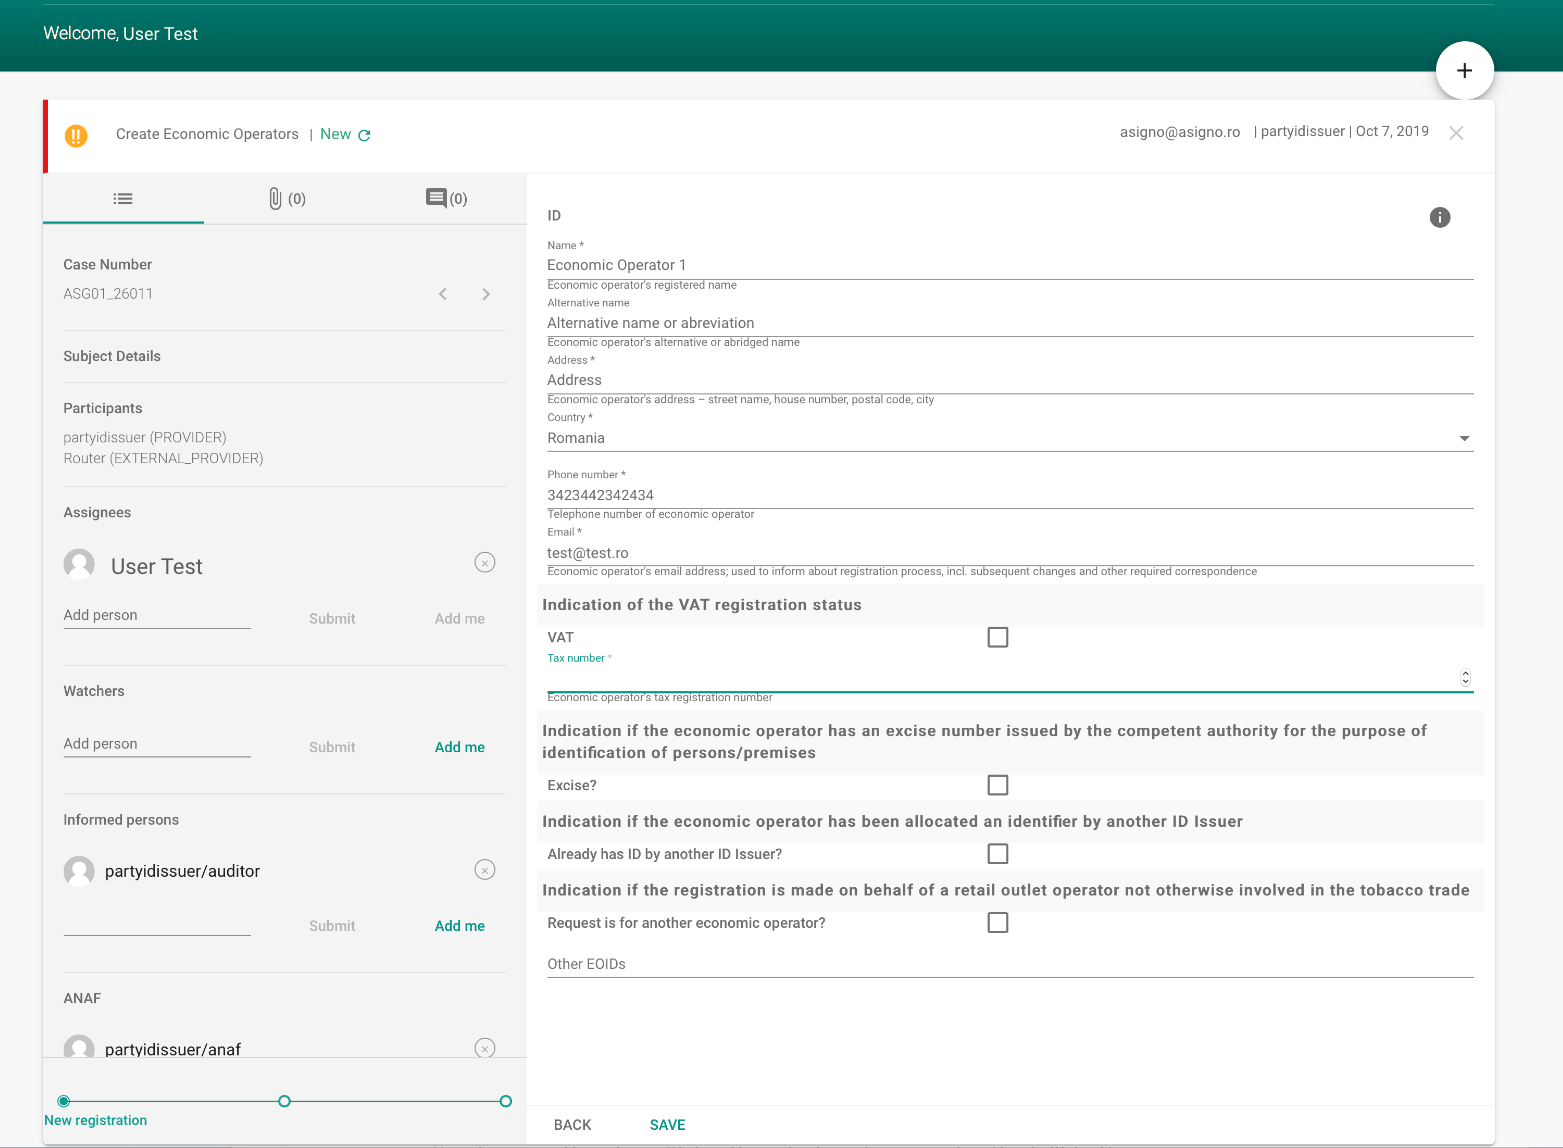
In the left pane, you can find details related to the case such as:
-
- The case number;
- Persons responsible for the execution of the case.
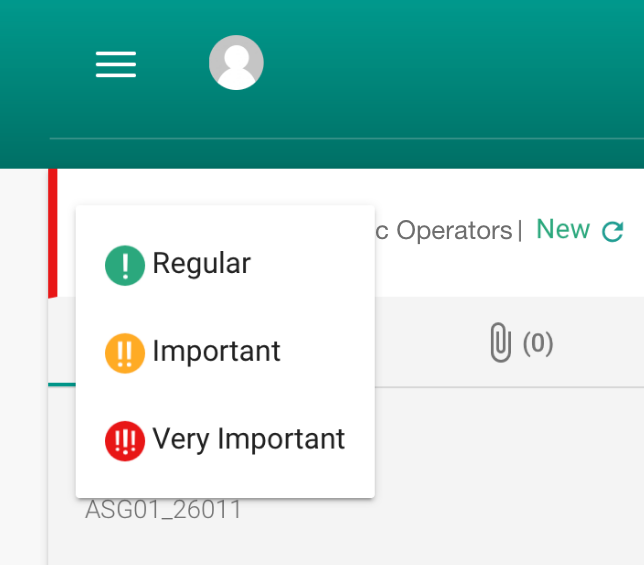
Changing the importance of the case can be done by acting the specific icon:
In the right pane, the Economic operator registration form is found. Mandatory fields are recognized upon the“*” markand are required to complete and validate the form.
The Save button will not activate until all required fields are filled in.
After saving the form, the user is redirected to a pre-view and confirmation page of the data about the new economic operator to be registered.
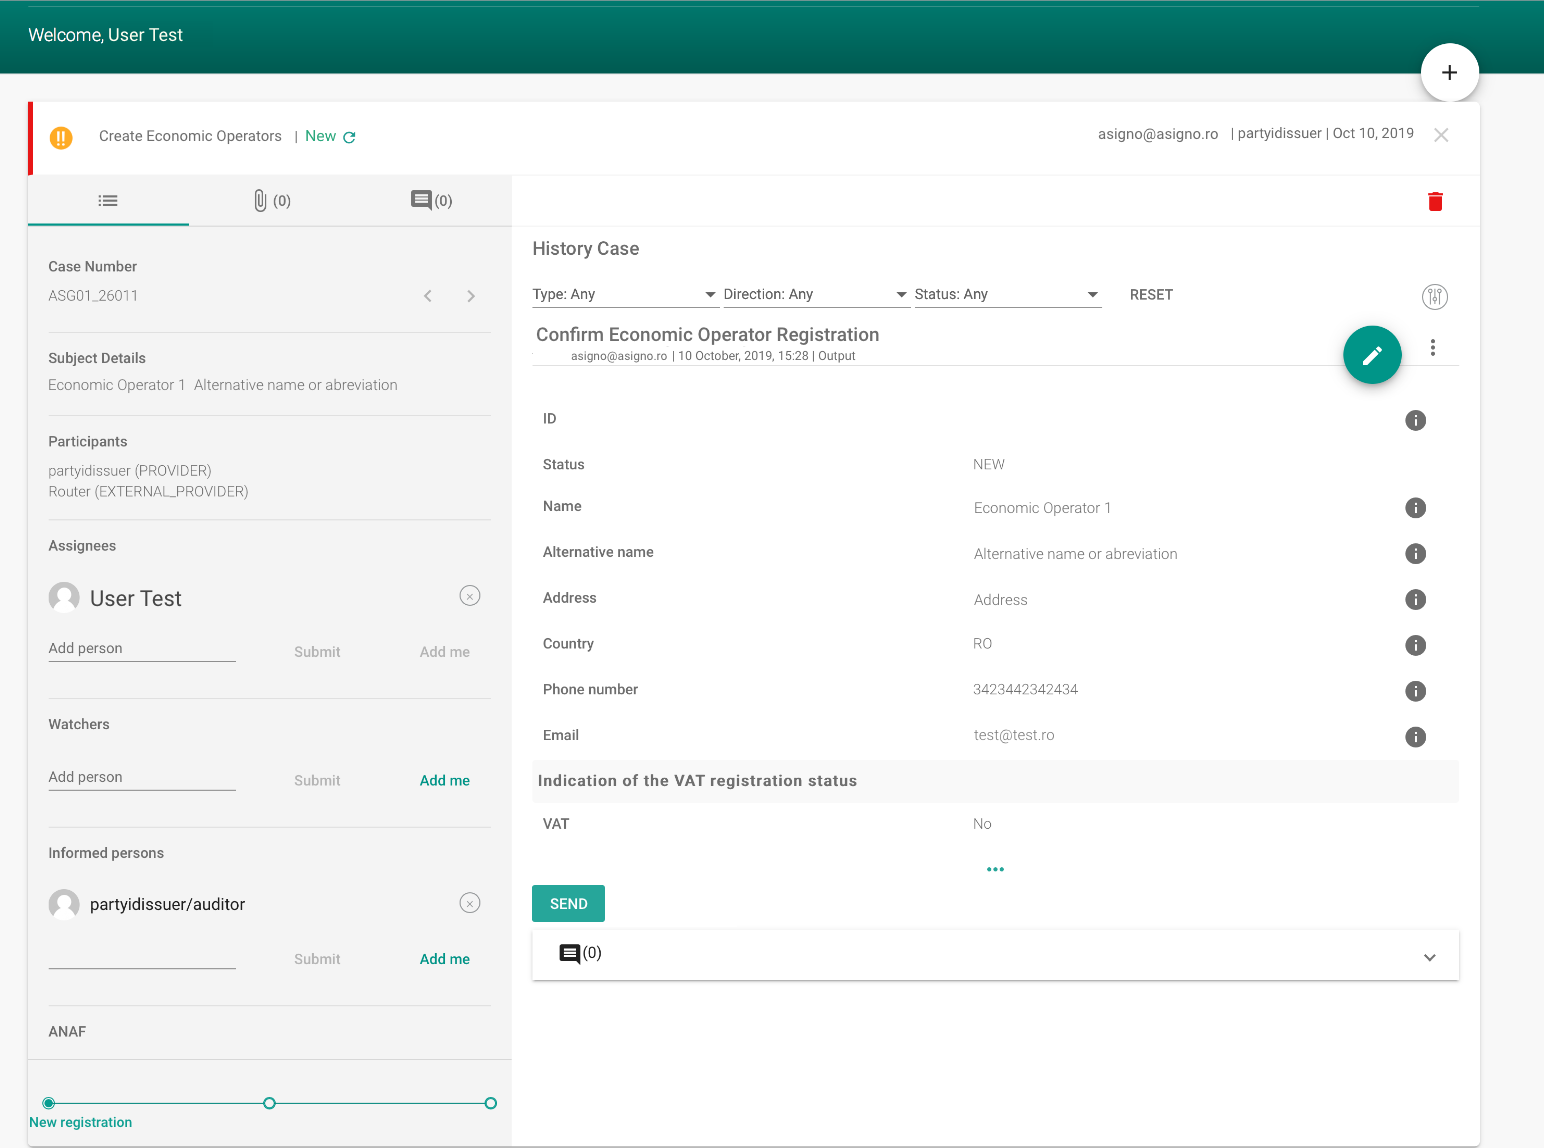
If all data has been entered correctly, the economic operator registration request is sent by pressing the “Send” button that will open a window with a confirmation message.←CONTENT
If the data has been wrongly entered, it can be edited by pressing the Edit button (green circle with a pen icon inside) that will redirect the user to the economic operator’s edit page.
After completing the data, save the form and validate the data entered by pressing the Send button to the European register of economic operators.
If the filled data are valid, it is possible to send the data to the European Register. An identification code of the economic operator, according to the policy CNIN for generating the identifiers of Economic operators, will be generate and the European Register will be updated.
If it you want to deactivate a previously created Economic operator, this can be done by pressing the “Deactivate Economic operator” button.
This option will open a window to add the deactivation details.
Once the request for deactivation is completed and saved, the user will be redirected to the case history page, where by pressing the Send button it will disable the Economic operator.
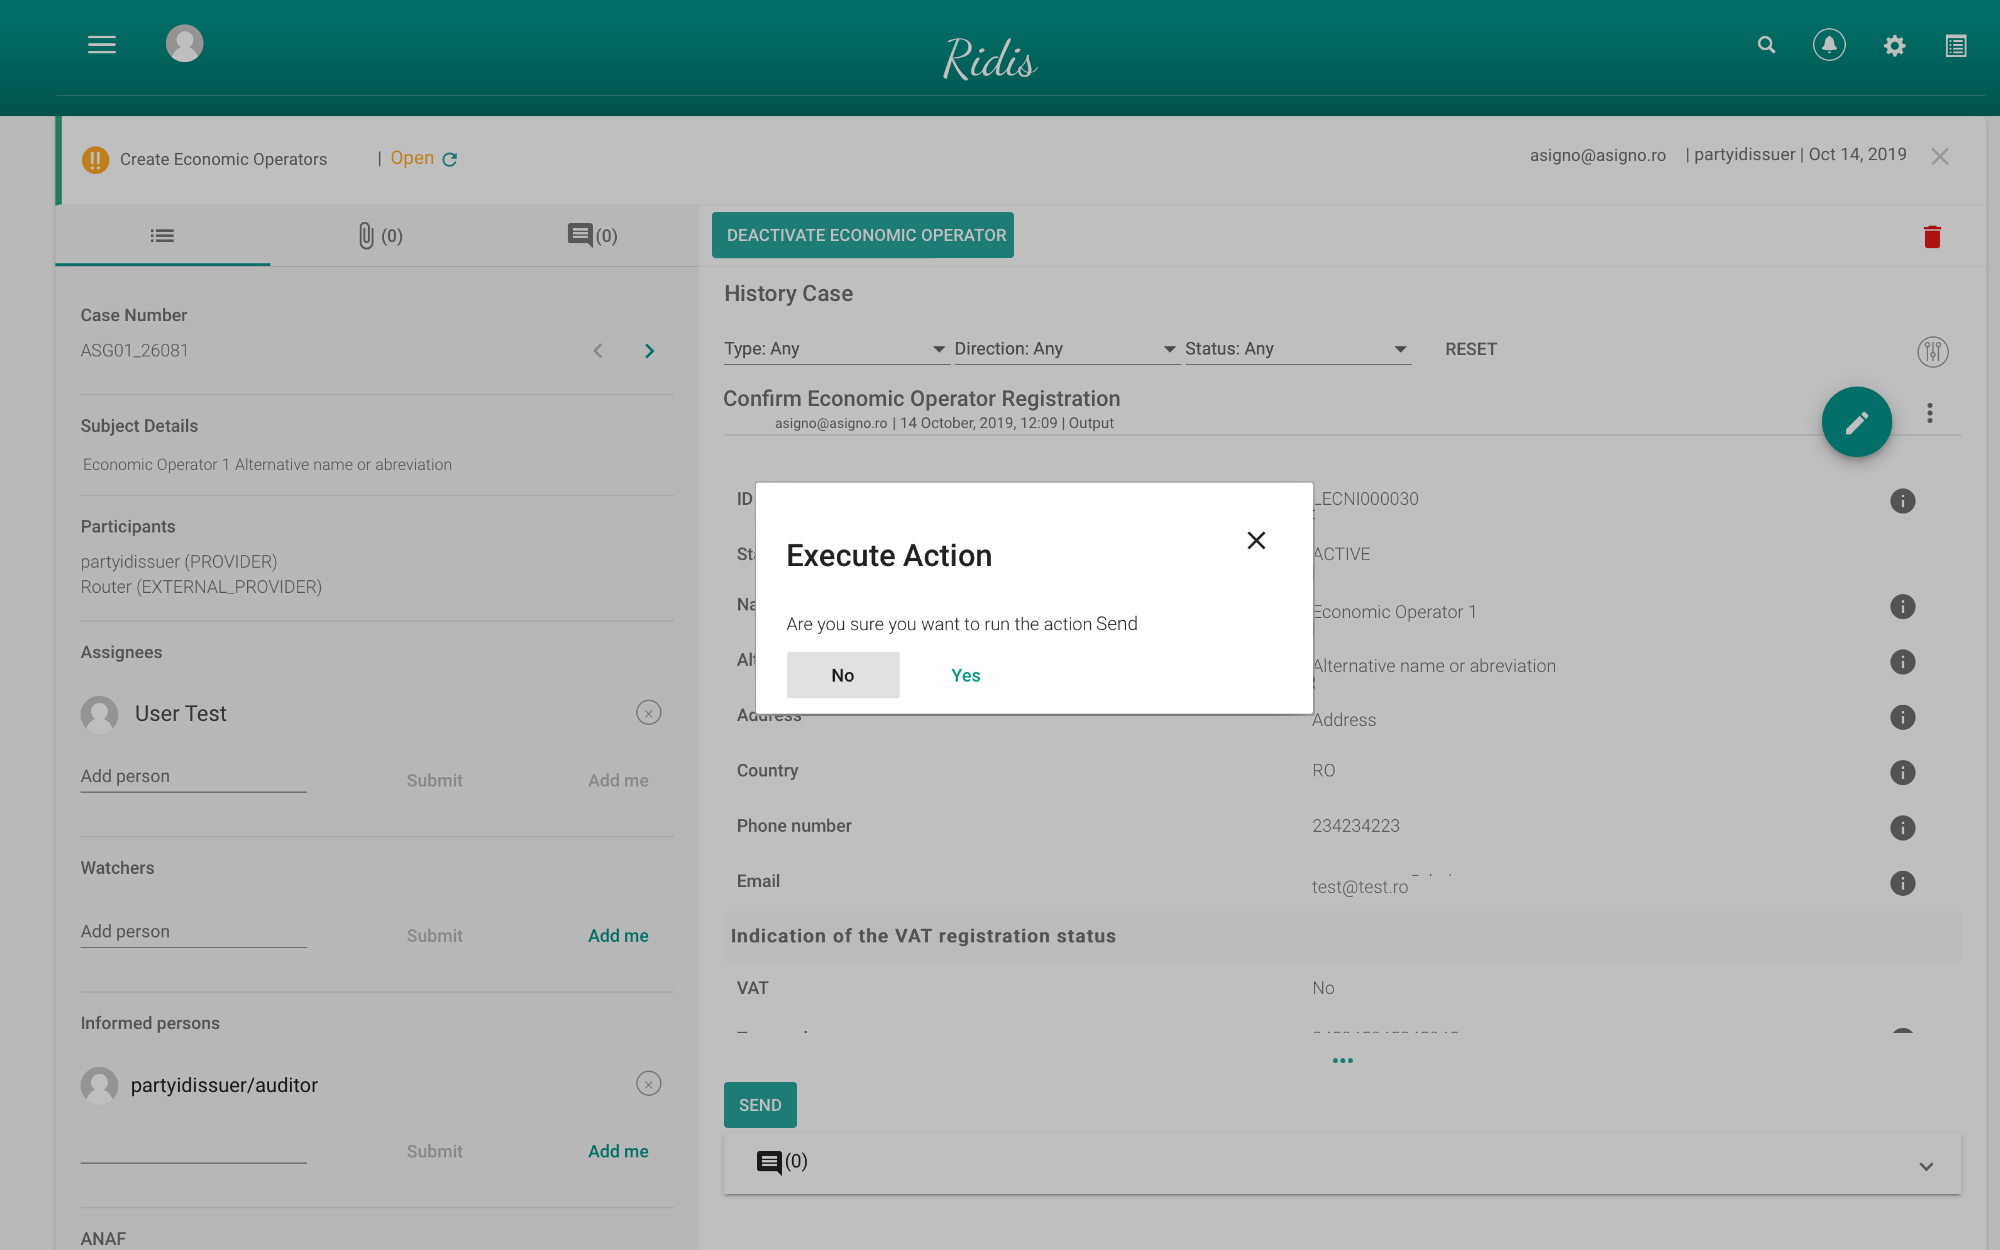
Once the economic operator has been deactivated, the case will be closed. ←CONTENT
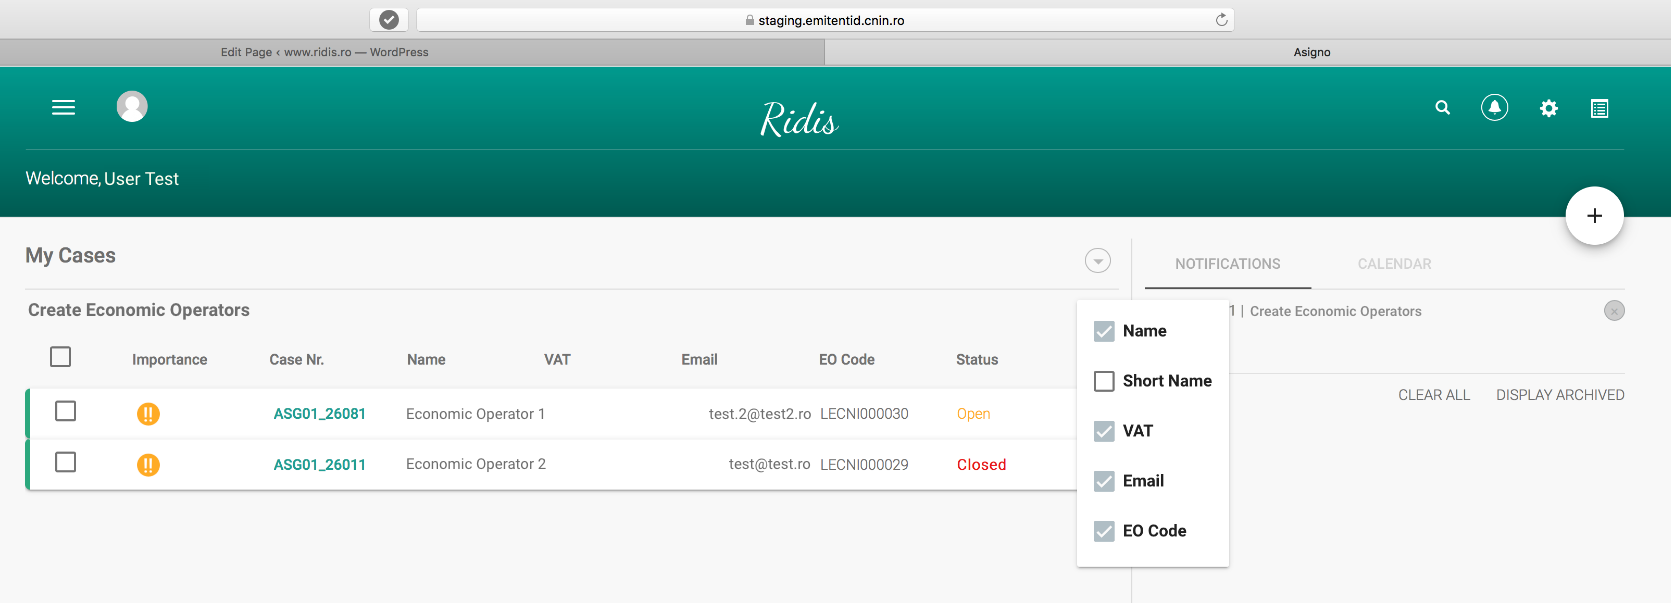
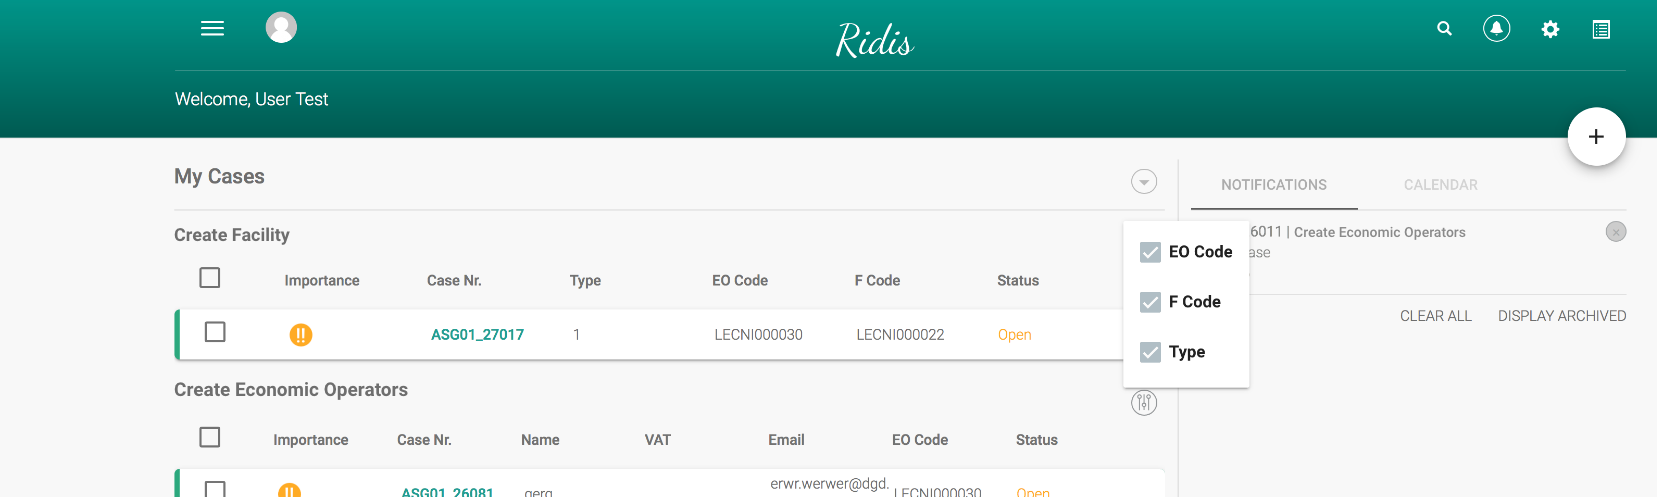
-
- The importance
- The case number;
- Name of the Economic operator;
- Abbreviated name;
- Tax identification number
- Code EO – Economic operator code;
- Status
The display features for this type of case can be configured by each user in part as can be seen in the figure below.
-
- New – The case was created, but:
- No data was entered,
- Data was entered, but the “Save” button was not pressed;
- Data was entered, saved, but the “Send” button was not pressed
- Open – The case was created, the necessary data was filled in, the data was saved, the “Send” button was pressed and thedata was recorded in the European Register;
- Closed – The case was created and sent, the data was recorded in the European register, but subsequently the Economic operator was deactivated←CONTENT;
- New – The case was created, but:
This case of use treats the process of registering the Facilities belonging to Economic operators, involved in trade in tobacco products, from manufacture to the first retail outlet. ←CONTENT
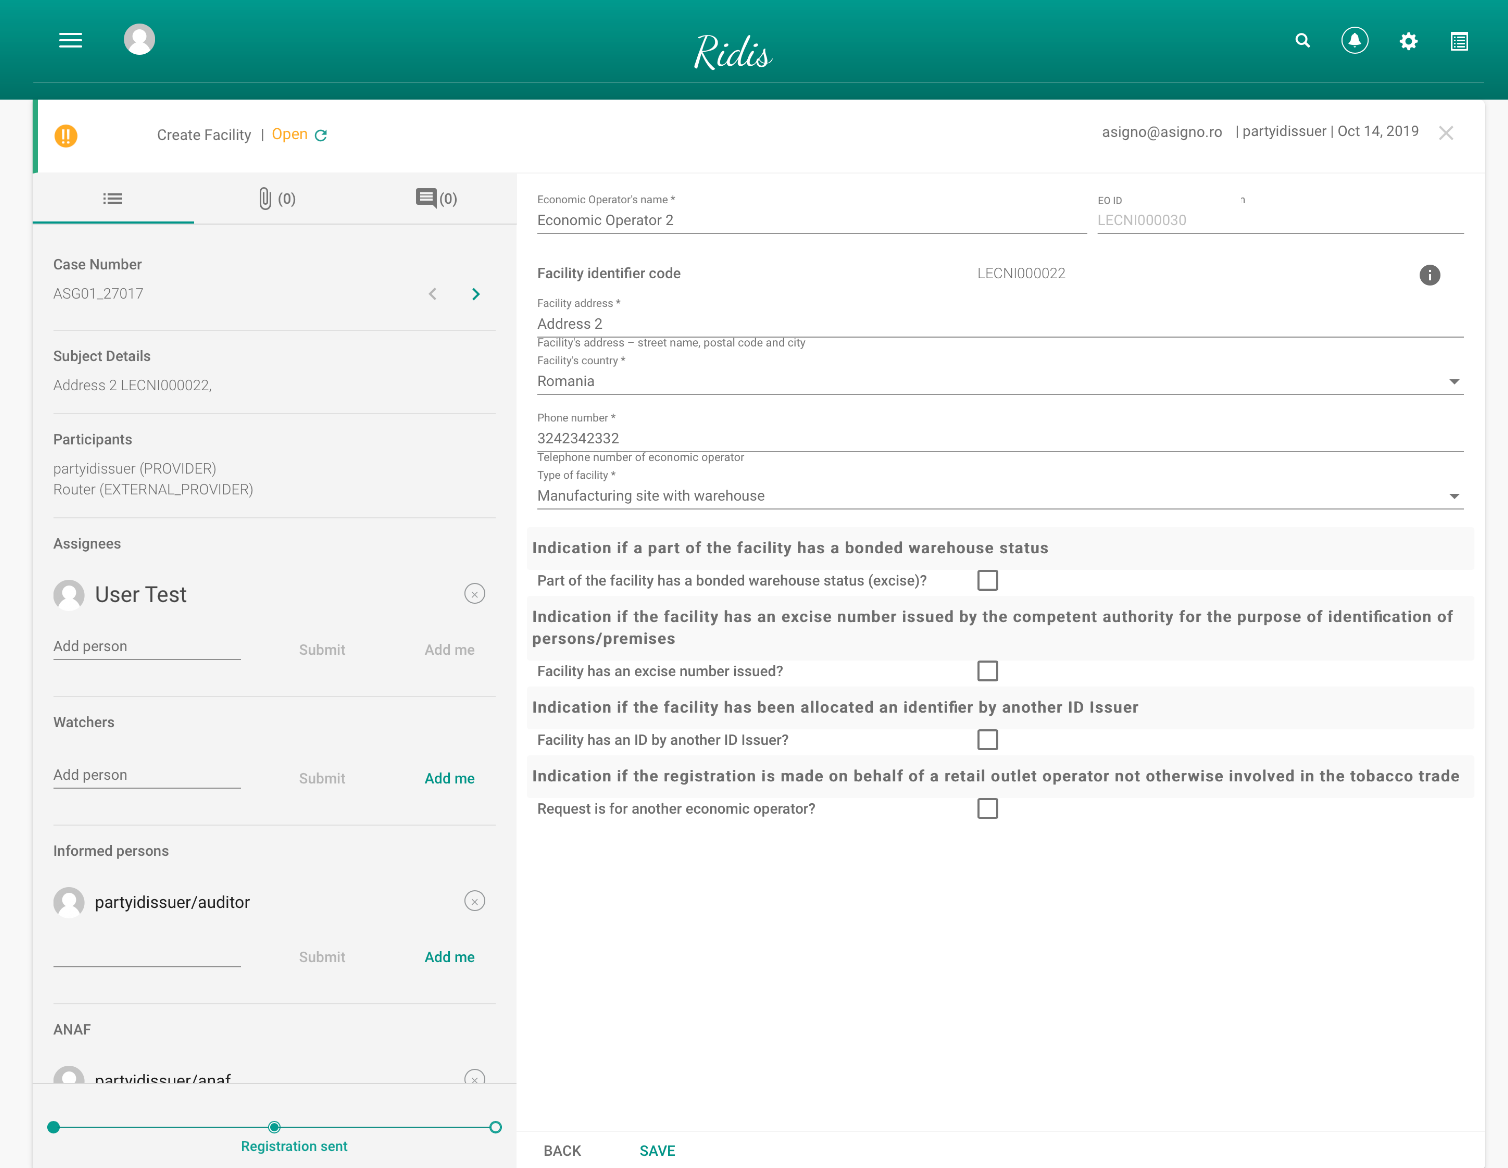
For the registration of a new Facility, you choose the “Create Facility” (CF) option.
At the top, you can see the case type, case status (new, open, closed), the person who created the case and the date of its creation.
The user will be able to validate the data entered for the Facility by pressing the Send button that will publish the data to the European register.
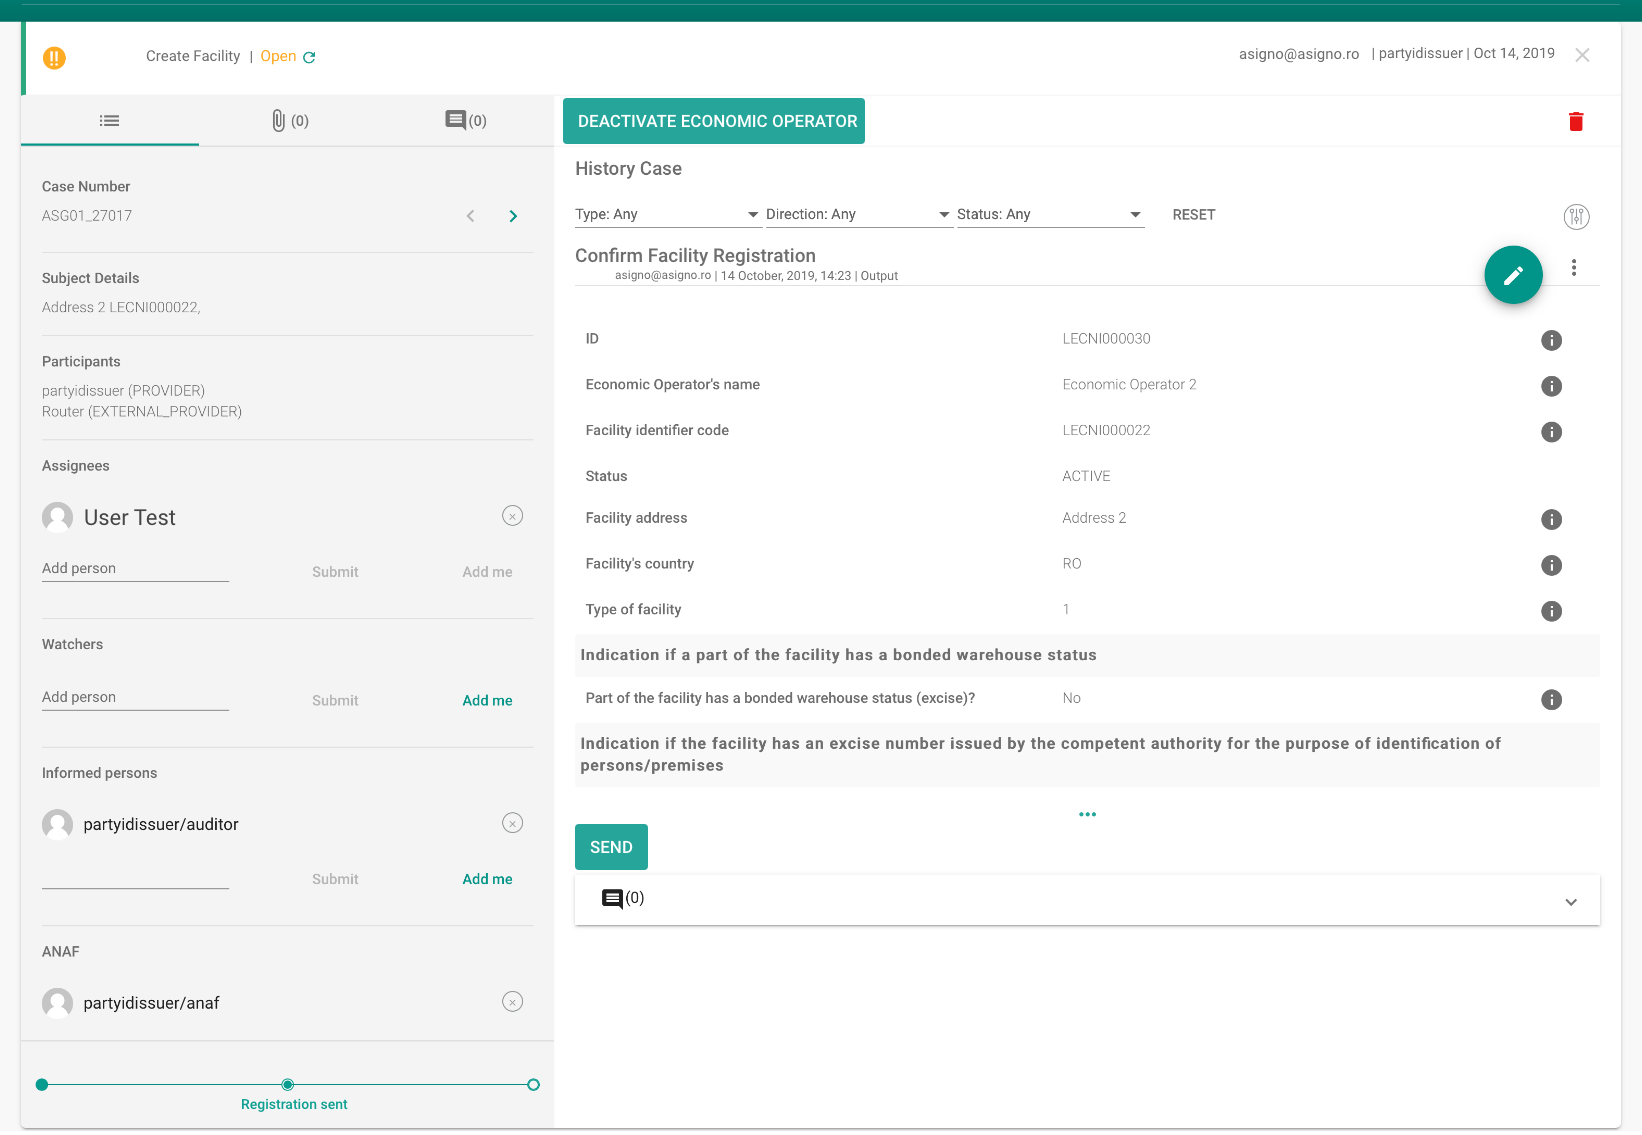
By pressing the Facility editing button (green circle with a pen icon inside), the user will be redirected to the edit screen of the Facility.
Any modification to the details of the Facility, also requires a reference to the data in the European register who will be updated too.
If the filled data are valid, it is possible to send the data to the European Register. An identification code of the Facility, according to the policy of CNN for generating the identifiers of Facilities, will be generate and the European Register will be updated.
If it you want to deactivate a previously created Facility, this can be doneby pressing the “Deactivate Facility” button.
This option will open a window to add the deactivation details.
Once the request for deactivation is completed and saved, the user will be redirected to the case history page. Here, by pressing the Send button it will disable the Machine and the case will be closed.←CONTENT
-
- The importance
- The case number;
- Code EO – Economic operator code;
- CODE F – Facility code;
- Type F – Facility type;
- Status
“Facility” cases can have 3 states that signify:
-
- New – The case was created, but:
- No data was entered,
- Data was entered, but the “Save” button was not pressed;
- Data was entered, saved, but the “Send” button was not pressed
- Open – The case was created, the necessary data was filled in, the data was saved, the “Send” button was pressed and thedata was recorded in the European Register;
- Closed – The case was created and sent, the data was recorded in the European register, but subsequently the Facility was deactivated←CONTENT ;
<
- New – The case was created, but:
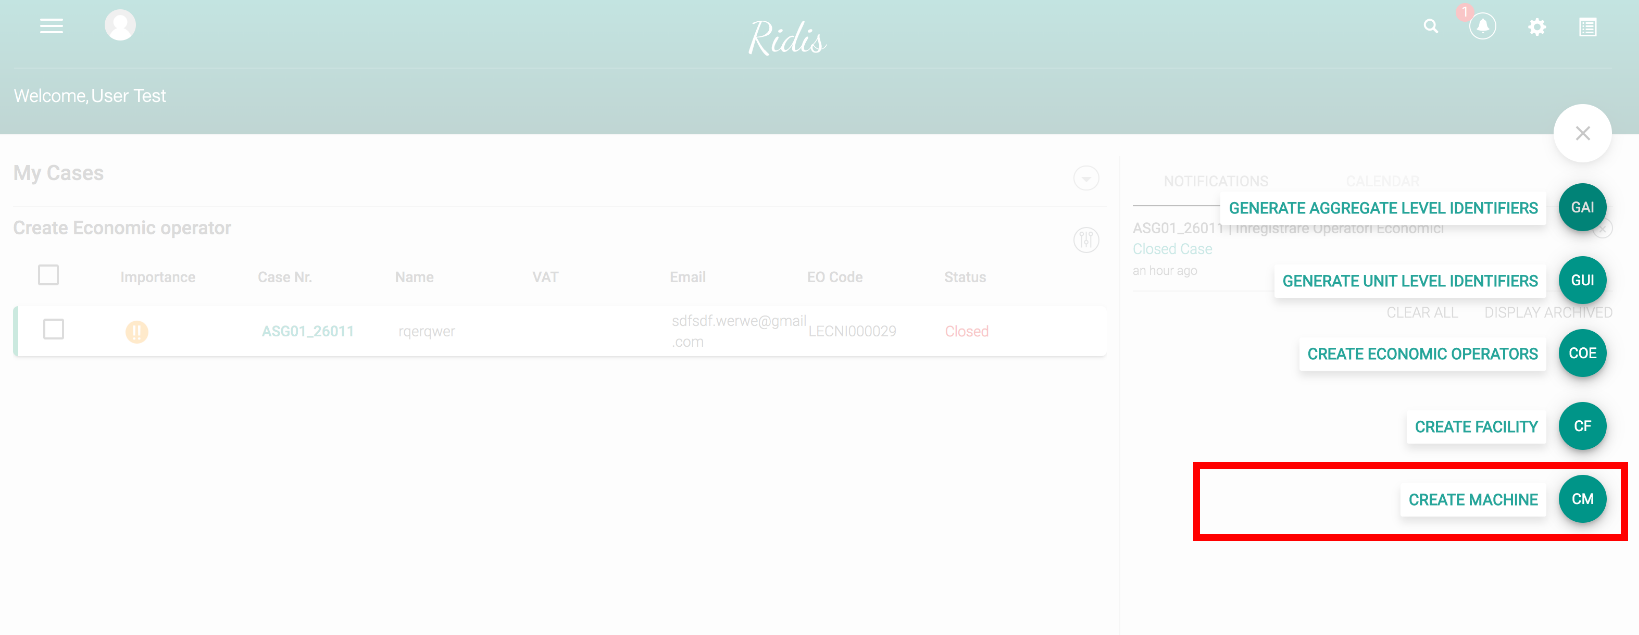
Management of “Machines”
For the registration of a new Facility, you choose the “Create Facility” (CF) option.
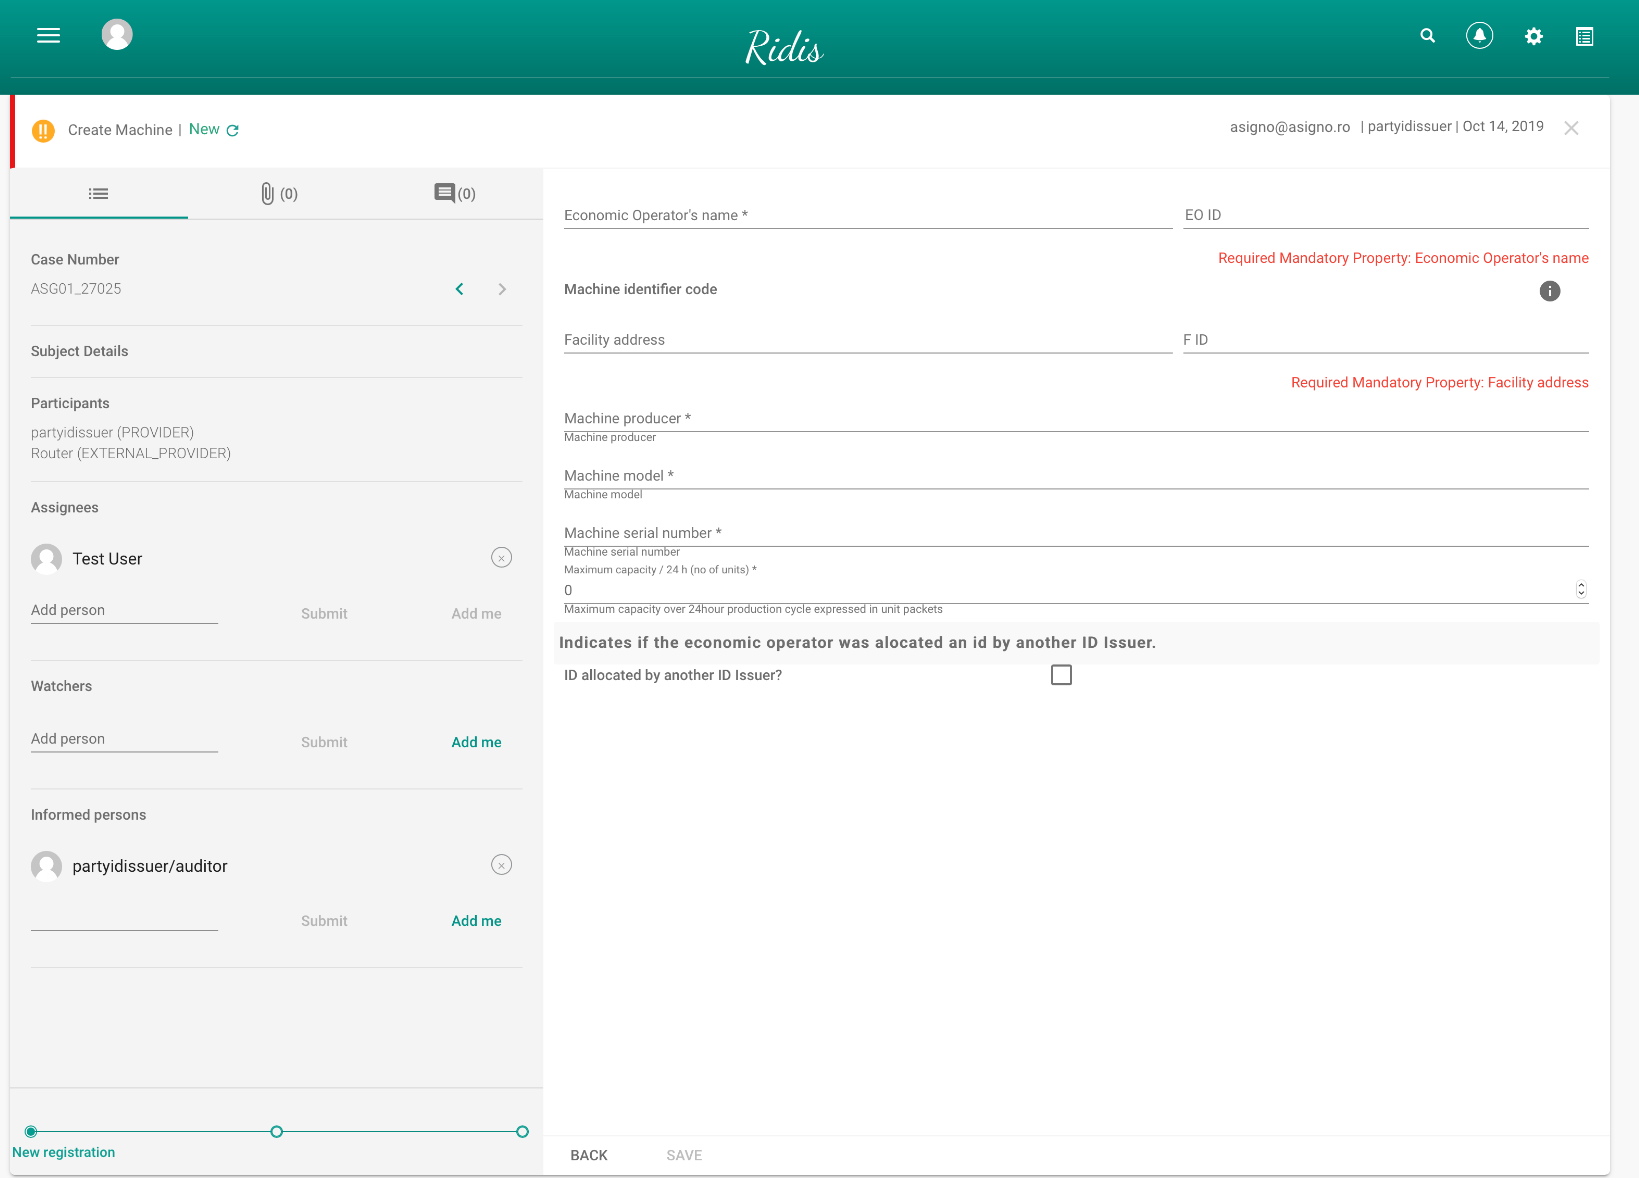
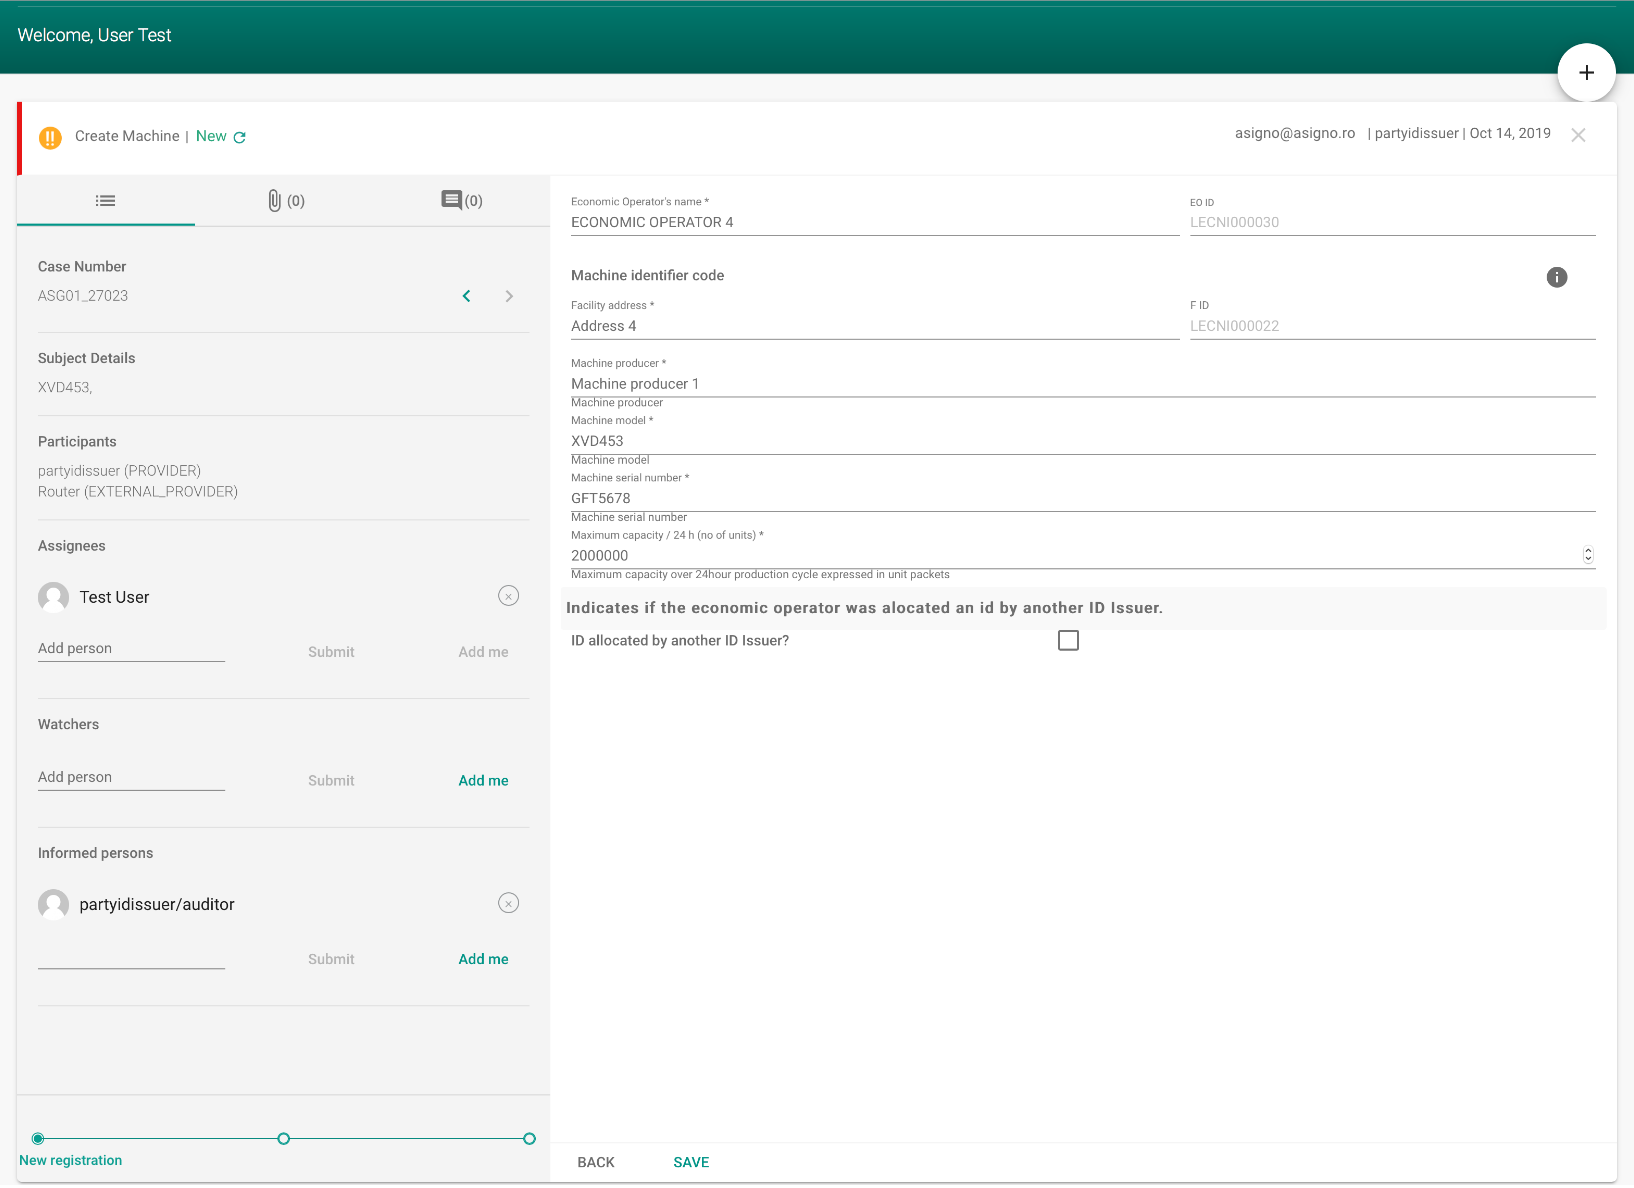
After accepting the terms and conditions the user must fill in the fields required for creating the case.
In the right pane, we will find the form to fill out. Mandatory fields are recognized after “*” and are required to complete and validate the form. The Save button will not activate until all required fields are filled in.
This option will open a window to add the deactivation details.
Once the request for deactivation is completed and saved, the user will be redirected to the case history page. Here, by pressing the Send button it will disable the Machine and the case will be closed.←CONTENT
Filtering of “Machine” type cases
-
- The importance
- The case number;
- Code EO – Economic operator code;
- CODE F – Facility code;
- CODE M – Machine code;
- Manufacturer
- Number of equipment;
- Status
Status of “Machine” type cases
“Machine” cases can have 3 states that signify:
-
- New – The case was created, but:
- No data was entered,
- Data was entered, but the “Save” button was not pressed;
- Data was entered, saved, but the “Send” button was not pressed
- Open – The case was created, the necessary data was filled in, the data was saved, the “Send” button was pressed and thedata was recorded in the European Register;
- Closed – The case was created and sent, the data was recorded in the European register, but subsequently the Machine was deactivated←CONTENT ;
- New – The case was created, but:
This case of use treats the process of generating unit level identifiers by manufacturers or importers of tobacco products.←CONTENT
Request of unit level identifiers
The user selects the option of Generating unit level identifiers and is redirected to the unit level identifiers request form.

The manufacturer or importer shall request in Ridis the issuance of Unit level identifiers. The request must contain the required data under EC Regulation 574/2018.

The user will be able to validate the data entered and by pressing the Send button to send the request.
The “ID issuer” platform waits for a business day before the unit codes are generated, during which time the user can cancel the request.
The manufacturer may request in Ridis the issuance of unit level identifiers as an emergency procedure with electronic or physical delivery mode. After selecting options, the process continues with the following customizations:
-
- In case of emergency, the codes are generated immediately;
- When the emergency is not selected, the codes are generated within one business day after sending the request.←CONTENT
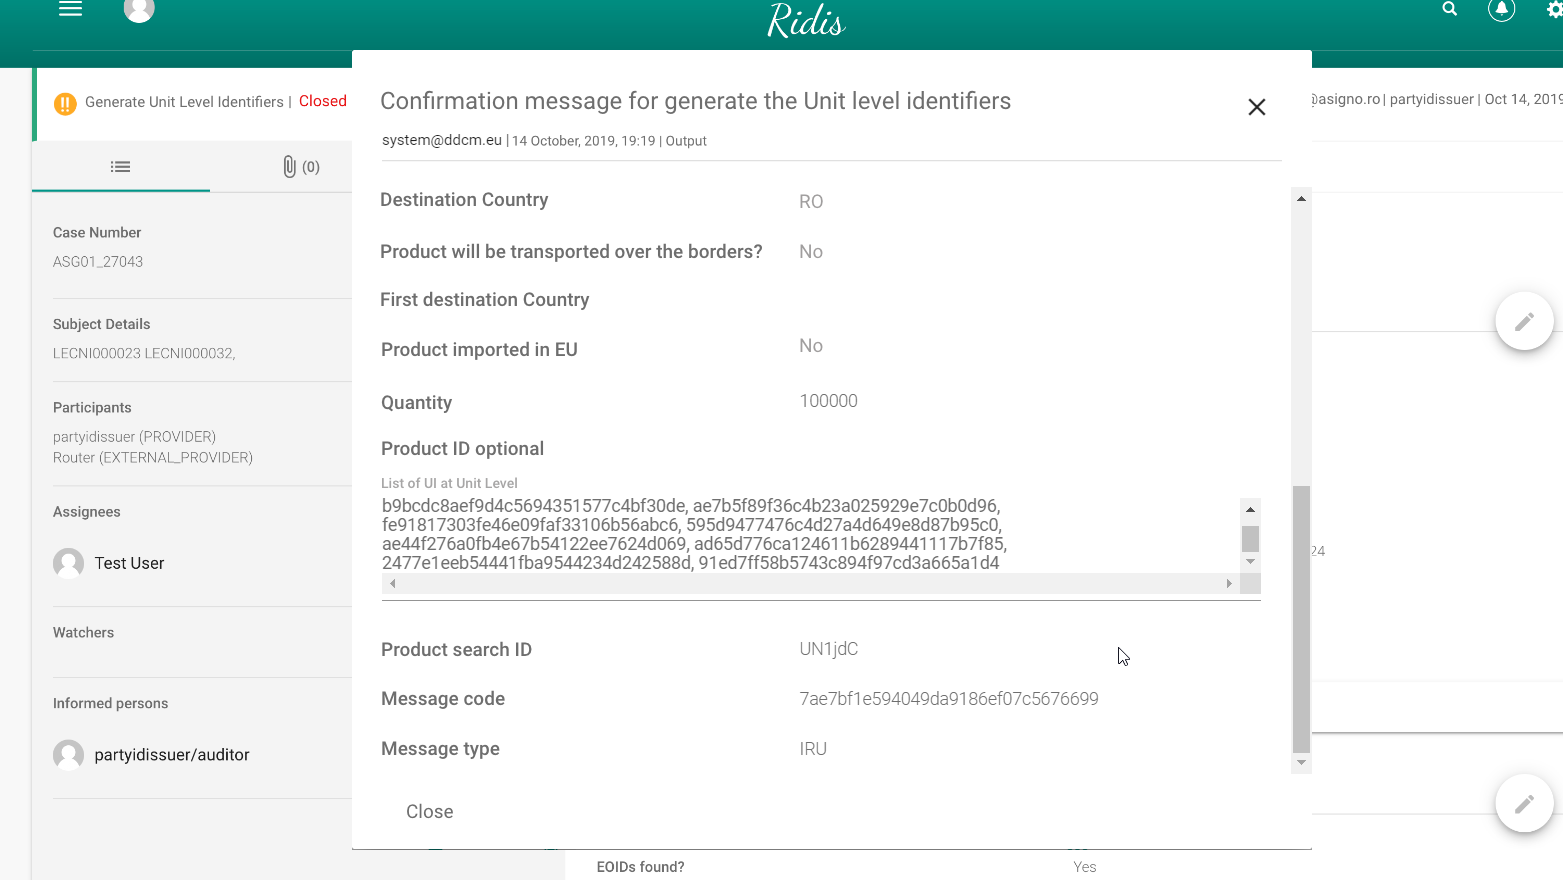
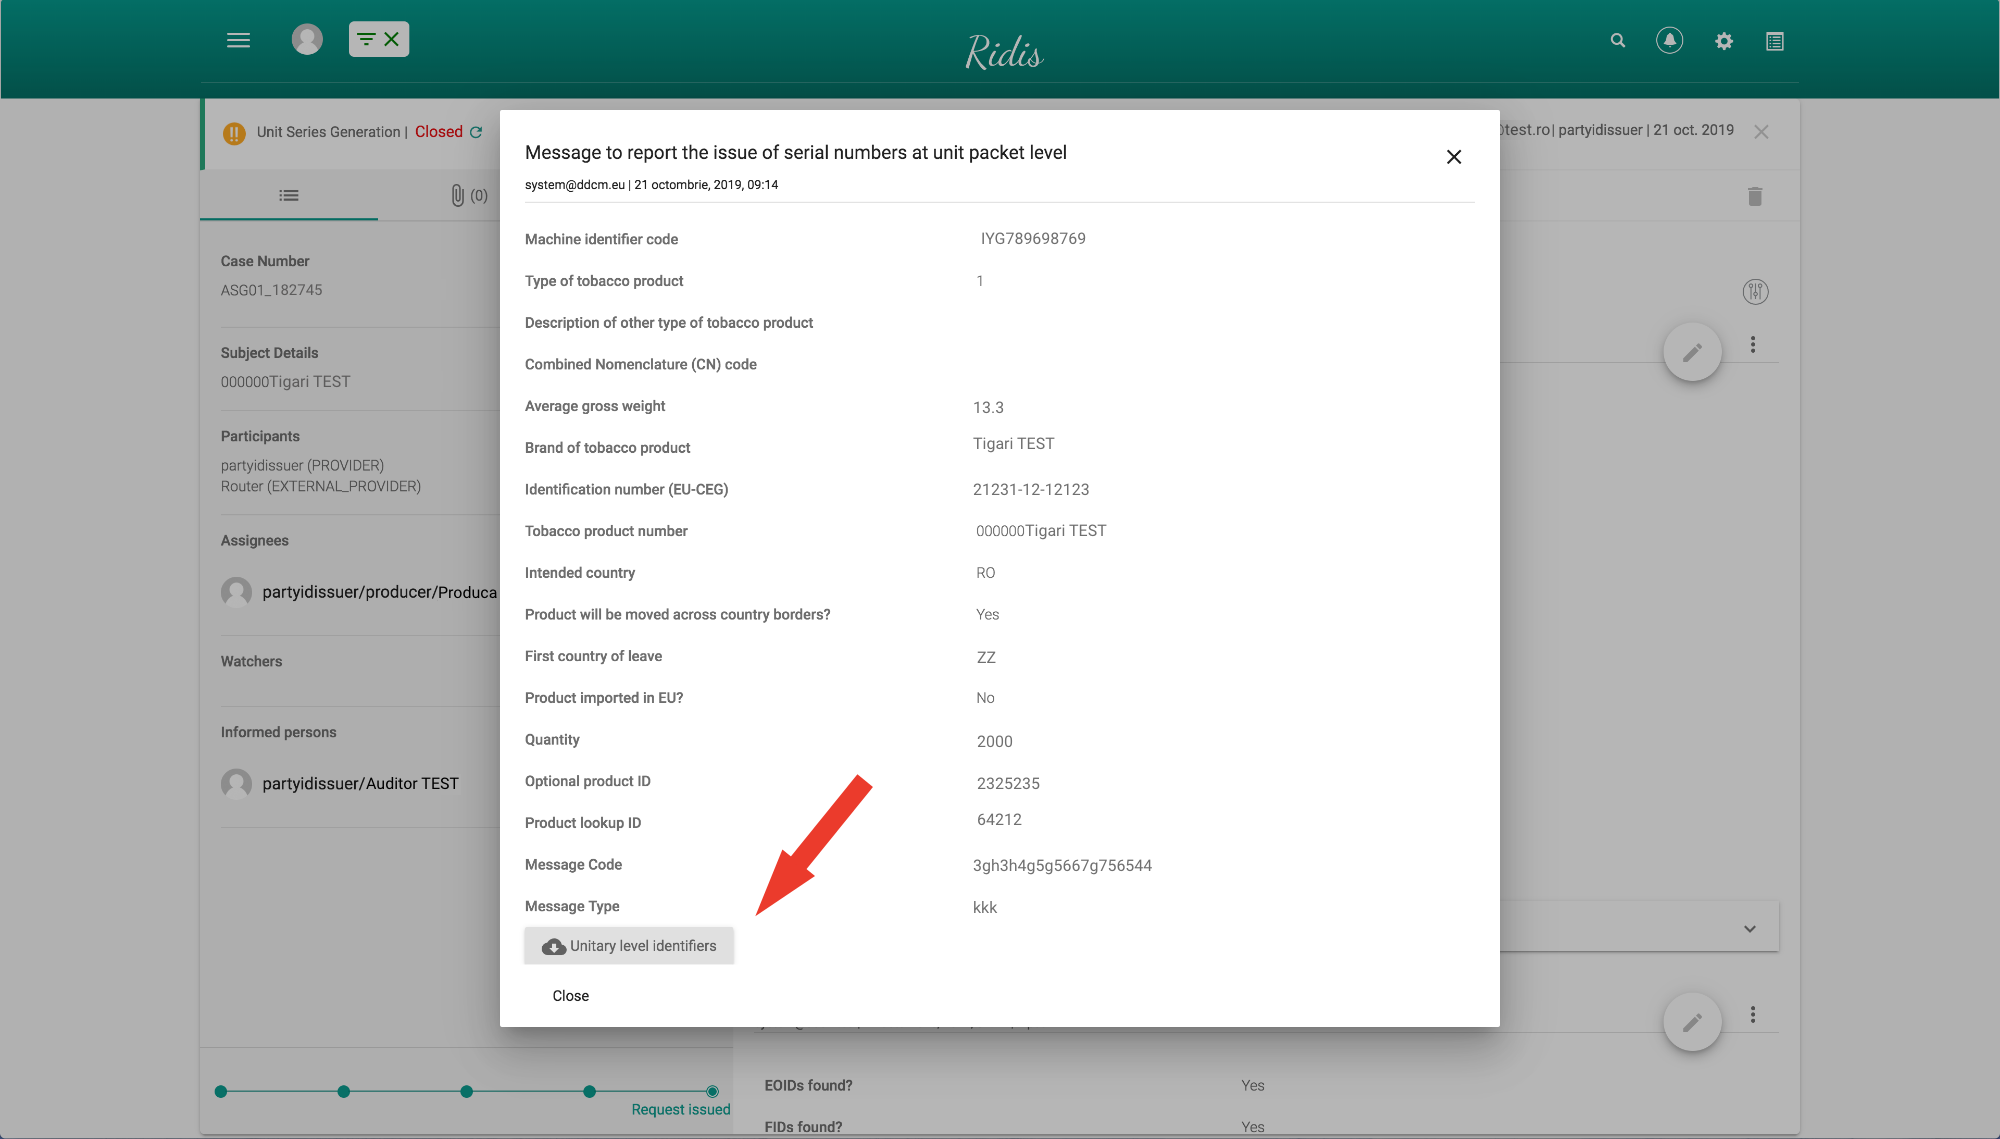
To download the unit level identifiers, we need to search and open the case in My Cases in the Generate Unit Level Identifiers section. Then in the History Case page we search for “Confirmation message for generate the Unit Level Identifiers” and we will click in the middle of this document.
After opening the document, we scroll down to its base and look for the download link, such as the one in the image marked with red arrow. To download the unit level identifiers, we will click on that link and the series will be downloaded in the computer preset location. The document is text-type.
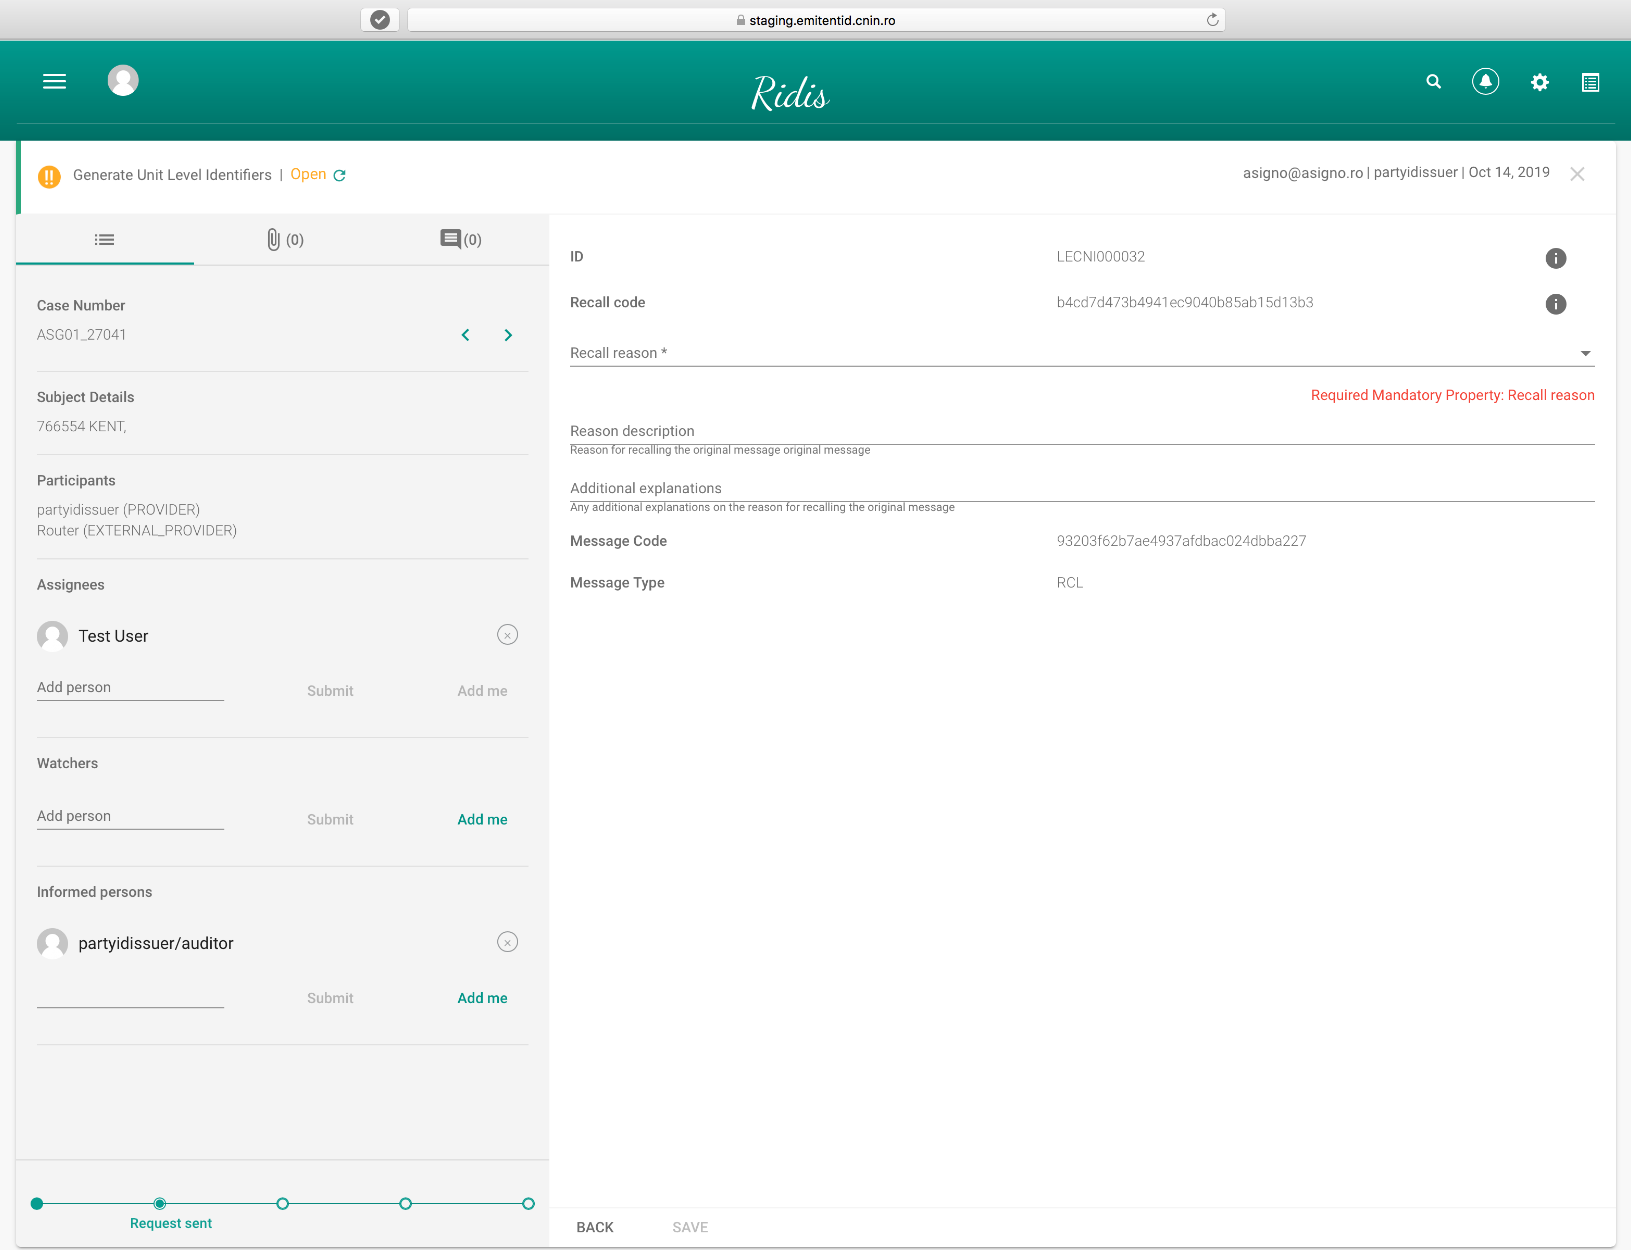
If the period of one working day has not expired, since the request for generating unit level identifiers has been sent, the request may be cancelled.
Status of “Unit Level Identifiers” type Cases
“Unit Level Identifiers” cases can have 3 states that signify:
-
- New– The case was created, but:
- No data was entered,
- Data was entered, but the “Save” button was not pressed;
- Data was entered, saved, but the “Send” button was not pressed
- Open – The case was created, the necessary data was filled in, the data was saved and the “Send” button was pressed;
- Closed-The case was created and sent:
- after passing the 24-hour interval, the unit series were issued
- the data validated and sent were incorrect, and the series could not be issued
- the user has cancelled the request within the 24-hour interval from the moment it was sent.
- New– The case was created, but:
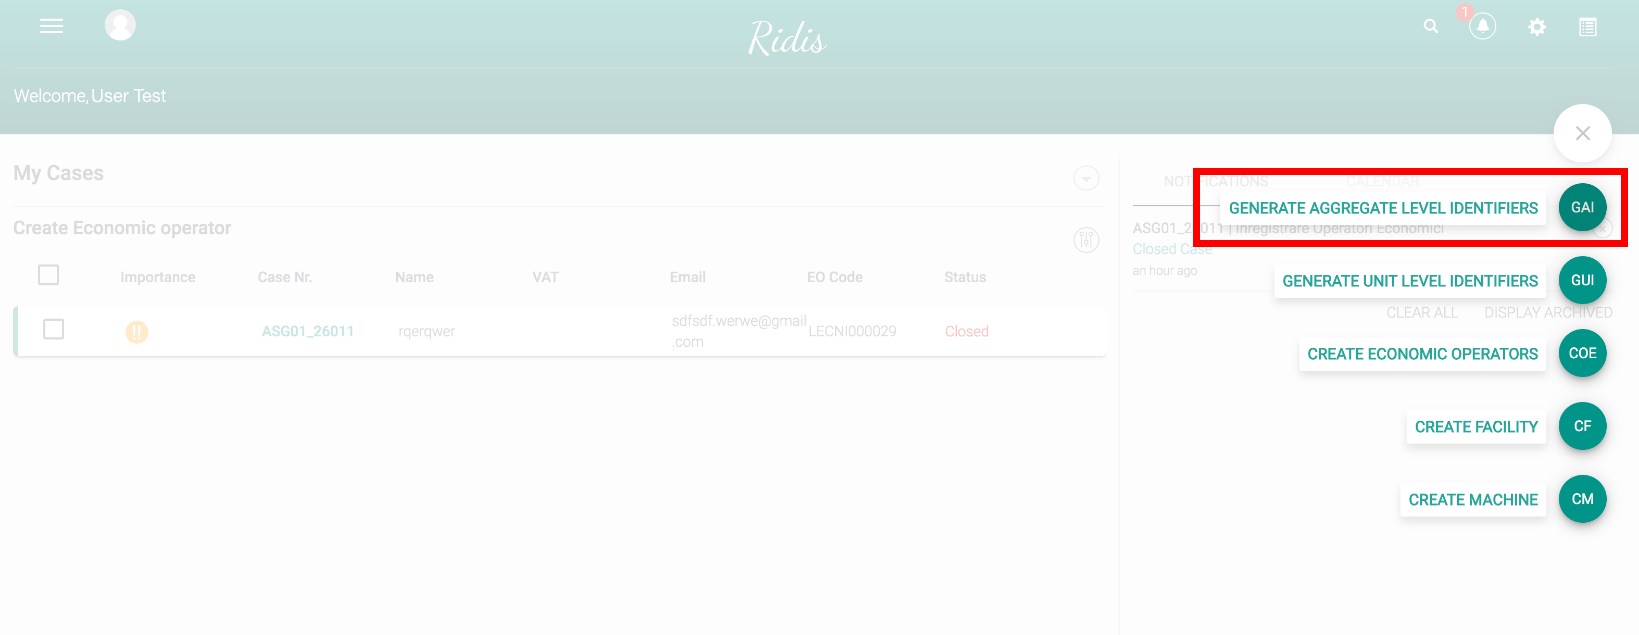
This case of use treats the process of generating aggregated level identifiers to manufacturers, importers and distributors.←CONTENT
The manufacturer, importer or distributors shall request the release of aggregated level identifiers to the CNIN.
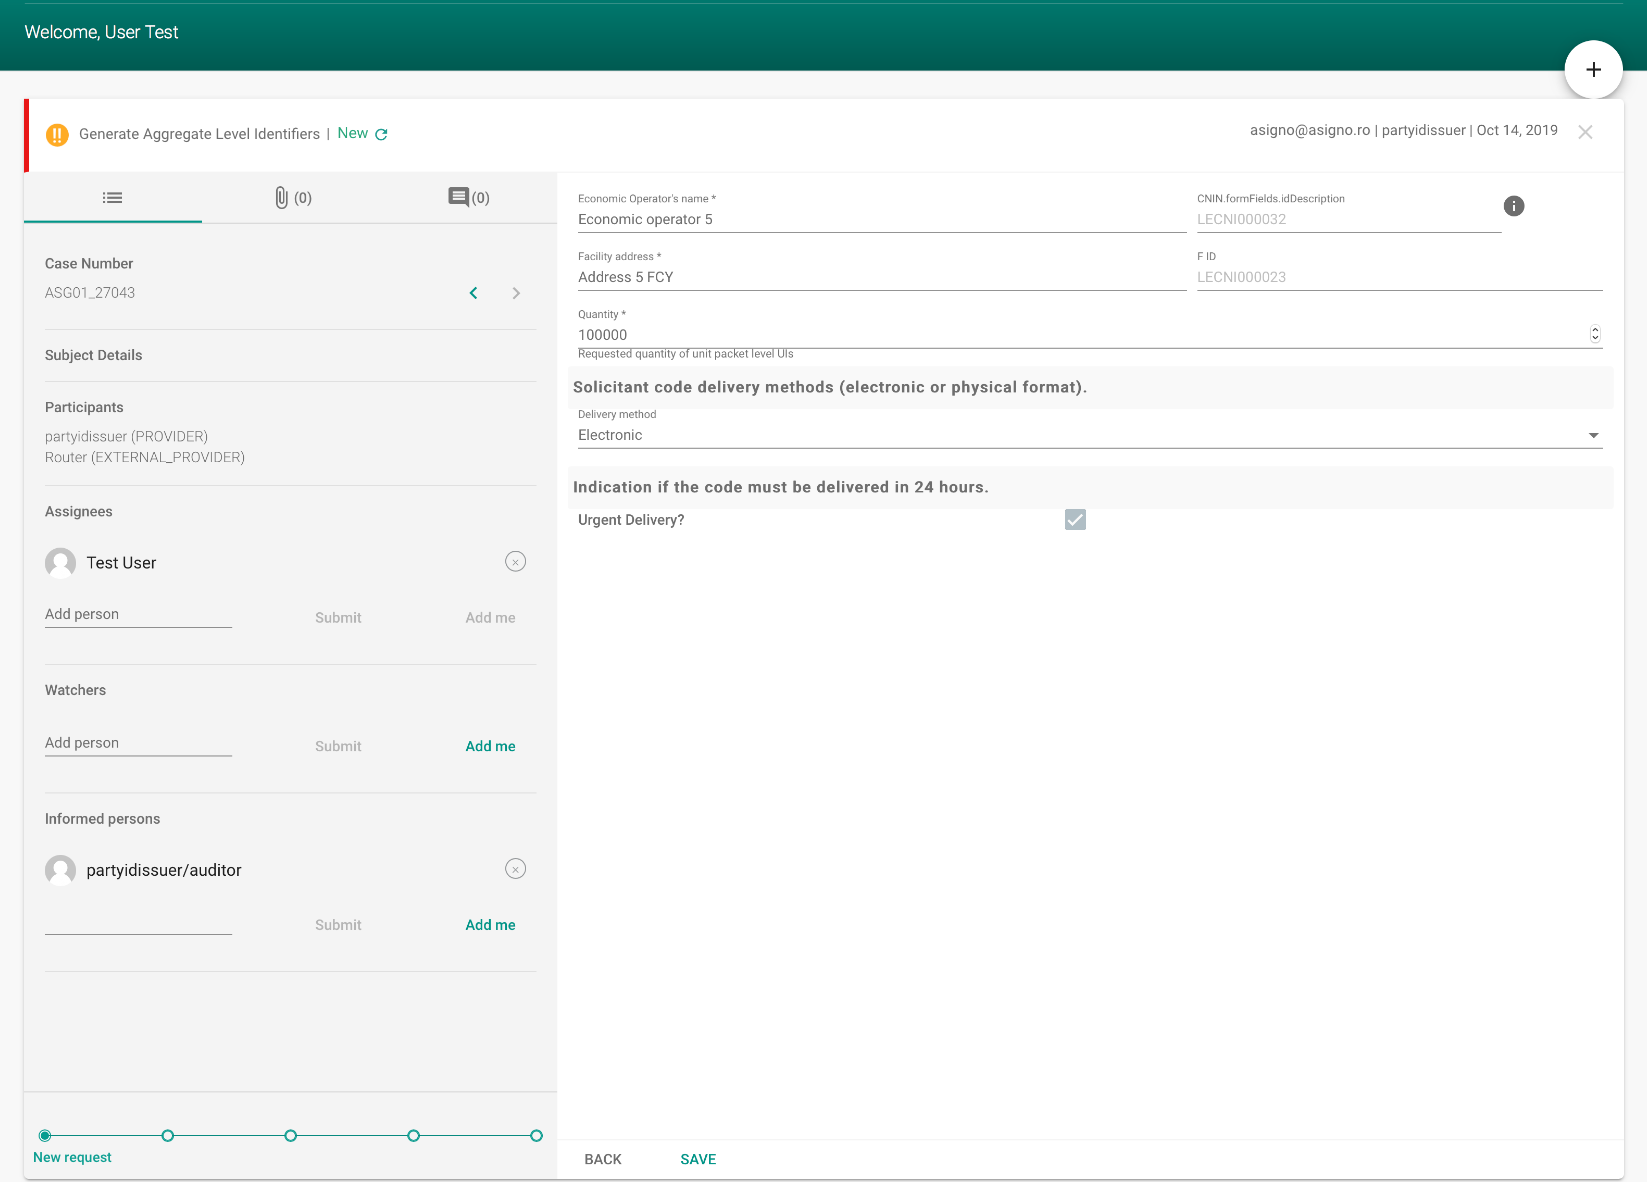
After accepting the conditions, the user is redirected to the form required to release aggregated level identifiers. This form must contain the required data under EU regulation 574/2018.

The manufacturer, importer or distributor verifies the data entered and can edit them if they have been wrongly entered.
After entering all the correct data, the request is sent.
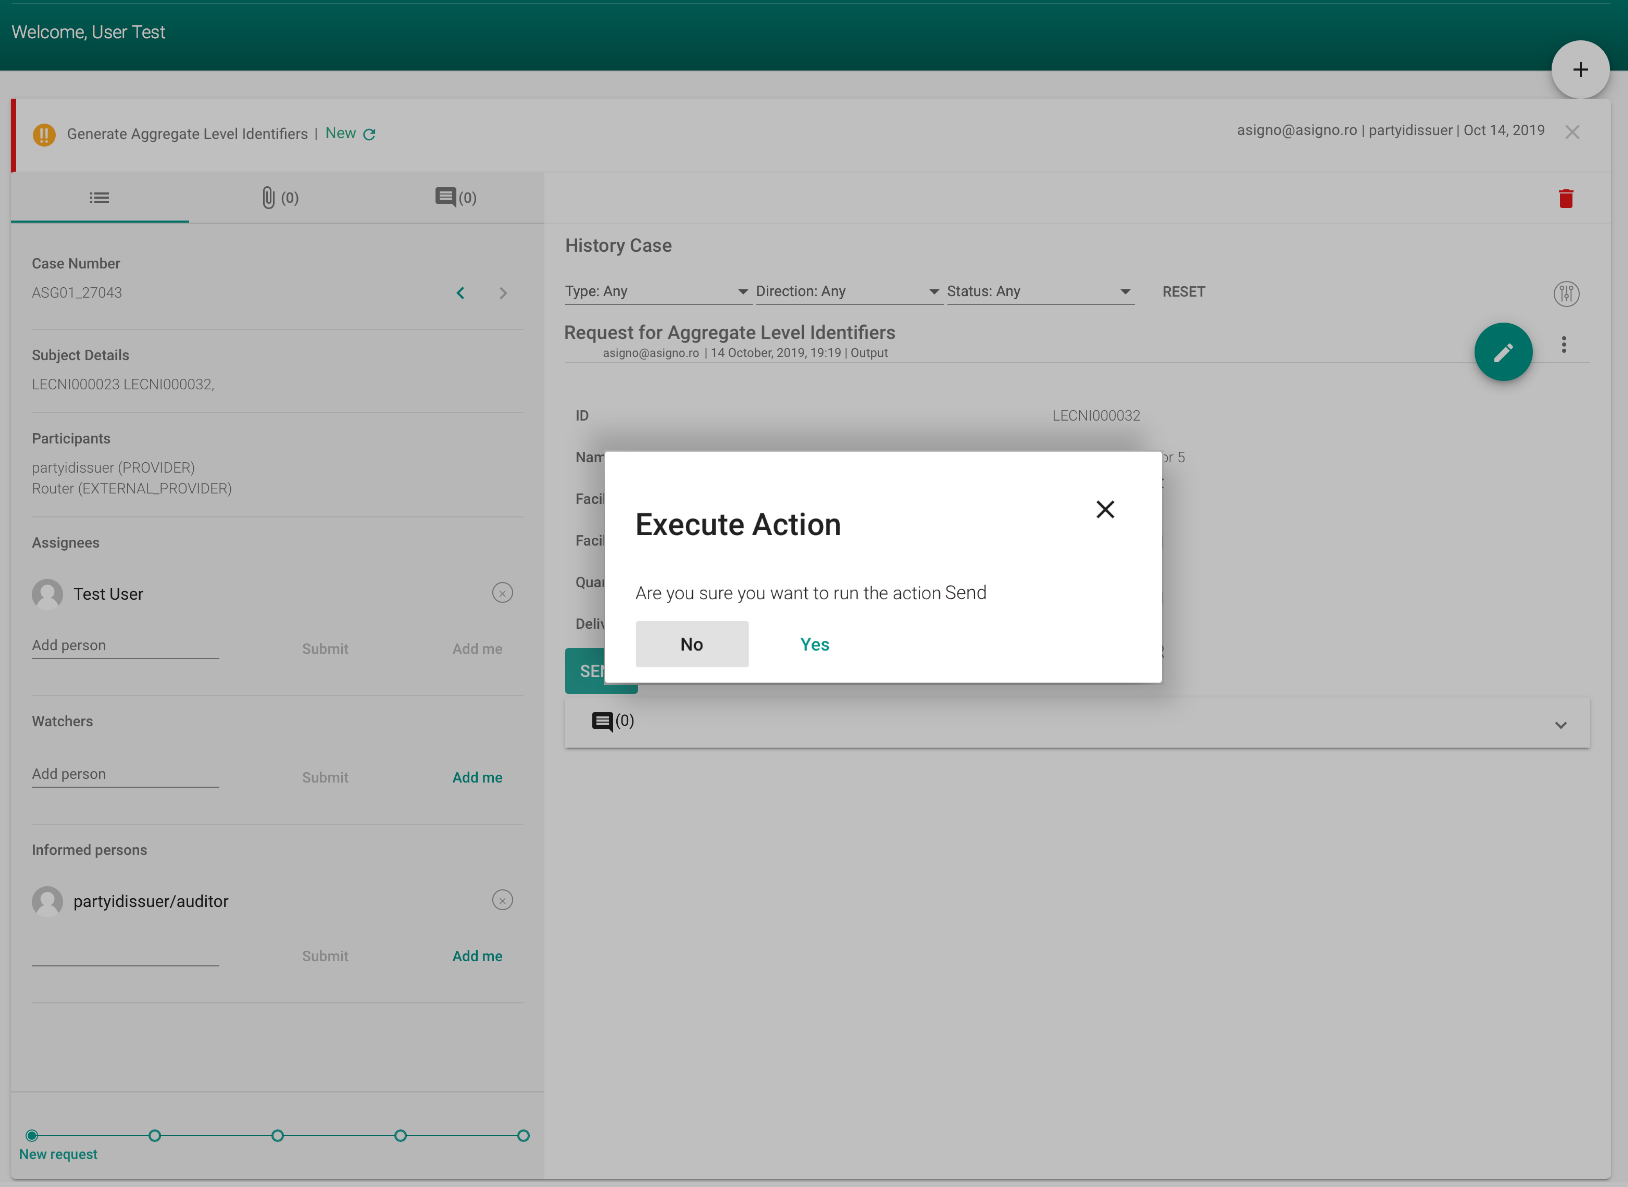
The “ID issuer” platform waits for a business day. During this time, the user can cancel the request.
The manufacturer may request in Ridis the issuance of aggregated level identifiers in an emergency mode with electronic or physical delivery mode. After selecting options, the process continues with the following customizations:
-
- In case of emergency, the codes are generated immediately;
- When the emergency is not selected, the codes are generated within one business day after sending the request;←CONTENT
To download the aggregate level identifiers, we need to search and open the case in My Cases in the Generate Aggregate Level Identifiers section. Then in the History Case page we search for “Confirmation message for generate the Aggregate Level Identifiers” and we will click in the middle of this document.
After opening the document, we scroll down to its base and look for the download link, such as the one in Download of level unit identifiers. To download the aggregate level identifiers, we will click on that link and the series will be downloaded in the computer preset location. The document is text-type.
Cancel the request
If the period of one working day has not expired since the request for generating aggregated level identifiers has been sent, the request may be cancelled.
Status of “Aggregate Level Identifiers” type Cases
“Aggregate Level Identifier ” cases can have 3 states that signify:
-
- New– The case was created, but:
- No data was entered,
- Data was entered, but the “Save” button was not pressed;
- Data was entered, saved, but the “Send” button was not pressed
- Open – The case was created, the necessary data was filled in, the data was saved and the “Send” button was pressed;
- Closed-The case was created and sent:
- after passing the 24-hour interval, the aggregate series were issued
- the data validated and sent were incorrect, and the series could not be issued
- the user has cancelled the request within the 24-hour interval from the moment it was sent.
- New– The case was created, but: